Cyanotypes
Introduction
There is an interesting history of the use of light-sensitive chemicals for the purpose of producing photographic images. The first such process was published at the same time by Henry Talbot and Louis Daguerre. That process used silver salts and visible light to create images. Sir John Herschel reported a different chemical method to the Royal Society in 1842. This was the cyanotype process. It is simple, non-toxic, and gives a chemically stable result which allows the images produced to be preserved and archived. Cyanotypes are produced by the incidence of strong ultraviolet light. It is a relatively slow process and so is unsuitable for making photographs directly, though it is still useful for making copies or prints. It was widely adopted by engineers and architects for copying technical drawings because it is cheap. This is the origin of the term ‘blueprint’, which is now used to describe any technical drawing or plan whether or not it was made using the cyanotype process.
In this lab activity a slightly different chemistry will be used. The traditional recipe uses ammonium ferric citrate (ammonium iron(III) citrate, [NH4]5[Fe(C6H4O7)2]) and potassium ferricyanide (potassium hexacyanoferrate(III), K3Fe(CN)6). The citrate ions served as electron donors to convert the ferric ions (Fe3+) into ferrous ions (Fe2+). The hexacyanoferrate(III) (Fe(CN)63–) ions are soluble alongside iron(III) ions but free iron(II) ions have an electron that can be donated to reduce other atoms or molecules. In fact, the free iron(II) ions reduce the iron atoms in the complex ion to the +2 oxidation state, becoming free iron(III) ions at the same time. This free iron(III) ion then reacts with the hexacyanoferrate(II) ions that have just been produced to produce the solid blue pigment, Prussian blue (Fe4[Fe(CN)6]3). This insoluble solid is the combination of iron(III) (Fe3+) ions with hexacyanoferrate(II) (Fe(CN)64–) ions. The fact that the iron ions in this compound are in two different oxidation states is what gives the dark blue of the pigment. This is due to transitions of electrons from the Fe2+ to Fe3+ within the complex.
The process used in this lab uses oxalic acid as an electron donor instead of the citrate ion, though citric acid can easily be substituted for oxalic acid in the procedure. Let’s take a closer look at the mechanism of this reaction. First, the iron(III) ions are reacted with the oxalate ion to make iron(III) oxalate and nitric acid. See equation 1.
Equation 1 2Fe(NO3)3 + 3H2C2O4 → Fe2(C2O4)3 + 6HNO3
The iron(III) oxalate takes on a variety of forms in solution with varying numbers of oxalate ions and water molecules coordinated with the iron(III) ion. One example is this complex ion: [Fe(C2O4)(H2O)4]+, which can be written more simply by taking the water molecules as implied: Fe(C2O4)+. Visible light photons lack the energy to break the coordinate bond between the oxalate ion and the iron(III) ion. Ultraviolet light, however, is capable of breaking this bond. When a photon with sufficient energy strikes the complex ion it breaks the bond between iron(III) and oxalate homolytically, leaving one electron behind on the iron(III) ion, converting it into an iron(II) (Fe2+) ion. A homolytic bond breakage means that one electron in the bond goes to one atom and the other electron goes to the other atom. Because it loses just one electron the oxalate ion becomes a radical anion, as seen in equation 2.
                            UV
Equation 2          Fe(C2O4)+ → Fe2+ + (C2O4·)–
A radical is a chemical species with an odd number of electrons. They are also called free radicals and are important in the manufacture of polymers and the catalytic breakdown of ozone in the atmosphere by chlorofluorocarbons. If you have heard of them before it is in the marketing of products as antioxidants, which have the ability to reduce a radical by donating an electron. Radicals form naturally in cells as a by-product of oxidative metabolism. These radicals can oxidize other materials and so antioxidants prevent this. The technical term for this is reduction, not anti-oxidation.
The (C2O4·)– radical anion is very unstable. After being broken away from the Fe3+ ion, the (C2O4·)– ion immediately decomposes into CO2 and a carbon dioxide radical anion, (CO2·)–. This radical species is also unstable and combines with another identical ion to dimerize, becoming the stable oxalate ion again, as seen in equation 3.
Equation 3a          (C2O4·)– → CO2 + (CO2·)–
Equation 3b          2(CO2·)– → C2O42–
This reaction mixture is combined directly with the potassium hexacyanoferrate(III) solution so that the reactants are all present together when the mixture is exposed to ultraviolet light. The iron(II) ions produced in the process shown in Equation 2 then have the opportunity to react with the hexacyanoferrate(III) ion to reduce the iron in the complex ion by donating an electron, as seen in equation 4. In other words, the iron(II) ions are a reducing agent which reduces [Fe(CN)6]3– to [Fe(CN)6]4–. Iron(III) and the hexacyanoferrate(II) ion form the insoluble Prussian blue pigment.
Equation 4 Fe2+ + [Fe(CN)6]3– → Fe3+(aq) + [Fe(CN)6]4–(aq) → Fe4[Fe(CN)6]3(s)
When present together in solution the product ions shown in equation 4 form the insoluble solid Prussian Blue. This compound is known as ferric ferrocyanide or iron(III) hexacyanoferrate(II) and has the formula Fe4[Fe(CN)6]3. Since these ions are not all present together until UV light creates the conditions under which the hexacyanoferrate(III) ions can be reduced to hexacyanoferrate(II) ions the process can be used to make a light-sensitive dye which will only form in those parts of a material soaked with the dye which are exposed to UV light.
It is possible to have a lengthy discussion of the chemistry and structure of this material but a few highlights will have to suffice. Prussian blue is arguably the first artificial pigment of the modern era and is almost certainly the first coordination compound ever produced. It does not occur in nature. Its color is true and will not fade even when exposed to direct sunlight, unless conditions are alkaline. This is in stark contrast with indigo dyes, such as those used for denim jeans. Unlike other blue pigments it is cheap and easy to obtain. Prussian blue is commonly used in both acrylic and oil paints by artists around the world. The traditional blue pigment for paints is ultramarine which is made by grinding up the semi-precious stone lapis lazuli (only available in mines in Afghanistan). This is a very expensive pigment and could only be used by artists who had very rich patrons paying for it!
Prussian blue has value outside the world of art in that its open crystalline structure makes it capable of absorbing cations like a sponge. The gaps in the crystal are so large that ions up to 182 pm in radius can fit inside. This fact is taken advantage of in the use of Prussian blue as a remedy for poisons such as thallium(I) (r = 164 pm) or radioactive cesium-137 (r = 181 pm). The Chernobyl disaster in 1986 caused a vast amount of radioactive dust to spread on the wind across western Europe. The hills of northwest England and Wales suffered from a dusting with the 30-year half-life radioisotope cesium-137. In one experiment to remedy the situation, specifically to keep sheep from being poisoned, the hills were transformed to navy blue by broad application of powdered Prussian blue. Later it was deemed sufficient to give the sheep the medicine in their feed when they return to the barn. This effort was successful as it kept cesium-137 out of the food supply.
Pre-lab Questions
Answer these questions before coming in to the lab. If you do not know how to make the drawing or answer the question then that is a hint that you should go find out. You have learned some chemical drawing skills in class: use these. Talk to your teacher. Do some research to find out. Do not simply find information and copy it down. Find a few articles, decide which ones have the best quality information, read the whole thing and write your answer from your own (new) knowledge.
- Who was John Herschel and how did he come to invent the cyanotype process? Please do not limit your research to the Wikipedia article. If nothing else, mine the sources listed at the bottom of the Wikipedia page.
- What is the more common chemistry for black-and-white photographs? Briefly, how does it work?
- Draw oxalic acid and the oxalate anion, including all lone pairs. Which atoms in the oxalate anion are capable of donating a pair of electrons to make a coordinate-covalent bond with an iron ion? Explain.
- What is heterolytic cleavage of a chemical bond? What is homolytic cleavage of a chemical bond? Which of these is important in the reaction mechanism used in the cyanotype process used in this lab? Justify your answer.
- What is the role of the oxalate ion in this procedure?
- What is an antioxidant and which chemical or chemicals in the reaction mechanism for this lab acts as an antioxidant? Explain.
Materials
- a piece of artist’s or filter paper
- graduated beral-type pipets
- 1 mL of 1.0 M Fe(NO3)3 (iron(III) nitrate) solution
- 1 mL of saturated H2C2O4 (oxalic acid) solution
- 1 mL of 0.45 M K3Fe(CN)6 (potassium hexacyanoferrate(III) or potassium ferricyanide) solution
- 3 drops of 6.0 M HCl (hydrochloric acid)
- 50-mL beaker
- glass stirring rod
- a wide artist’s brush
- filter paper or artist’s paper
- paper towels
- one or more self-selected objects to make a sunprint OR:
- a photographic negative printed out large OR:
- a drawing or design you have made on a transparency using water-soluble markers
- corrugated carboard pieces large enough to cover treated paper
- an ultraviolet lamp (or go outside to use sunlight)
- large tub for rinse water
Safety
- If you choose not to wear safety glasses you are choosing to sit out the lab.
- The ultraviolet (UV) light produces radiation with sufficient energy per photon to damage living tissue. For extended exposure damage to skin and eyes may result.
- Iron(III) nitrate (Fe(NO3)3) is corrosive and mildly toxic. Avoid exposure. If on skin, rinse with plenty of water. If in eyes rinse with water in an eye wash, remove contact lenses if present, and continue rinsing for 15 minutes. If swallowed rinse mouth with water and call a poison control center. (1-800-222-1222) Wash thoroughly after handling.
- Oxalic acid (H2C2O4) is highly corrosive and mildly toxic. Avoid exposure. It can cause severe skin burns and eye damage. The oral-rat LD50 is 375 mg/kg. If swallowed, rinse mouth. Do NOT induce vomiting. Contact a poison control center. If on skin, rinse with plenty of water. If in eyes rinse with water in an eye wash, remove contact lenses if present, and continue rinsing for 15 minutes. Wash thoroughly after handling.
- Potassium hexacyanoferrate(III), K3Fe(CN)6) is mildly toxic (oral-rat LD50: 1600 mg/kg). If swallowed, contact a poison control center. If on skin, rinse with plenty of water. If in eyes rinse with water in an eye wash, remove contact lenses if present, and continue rinsing for 15 minutes. Wash thoroughly after handling.
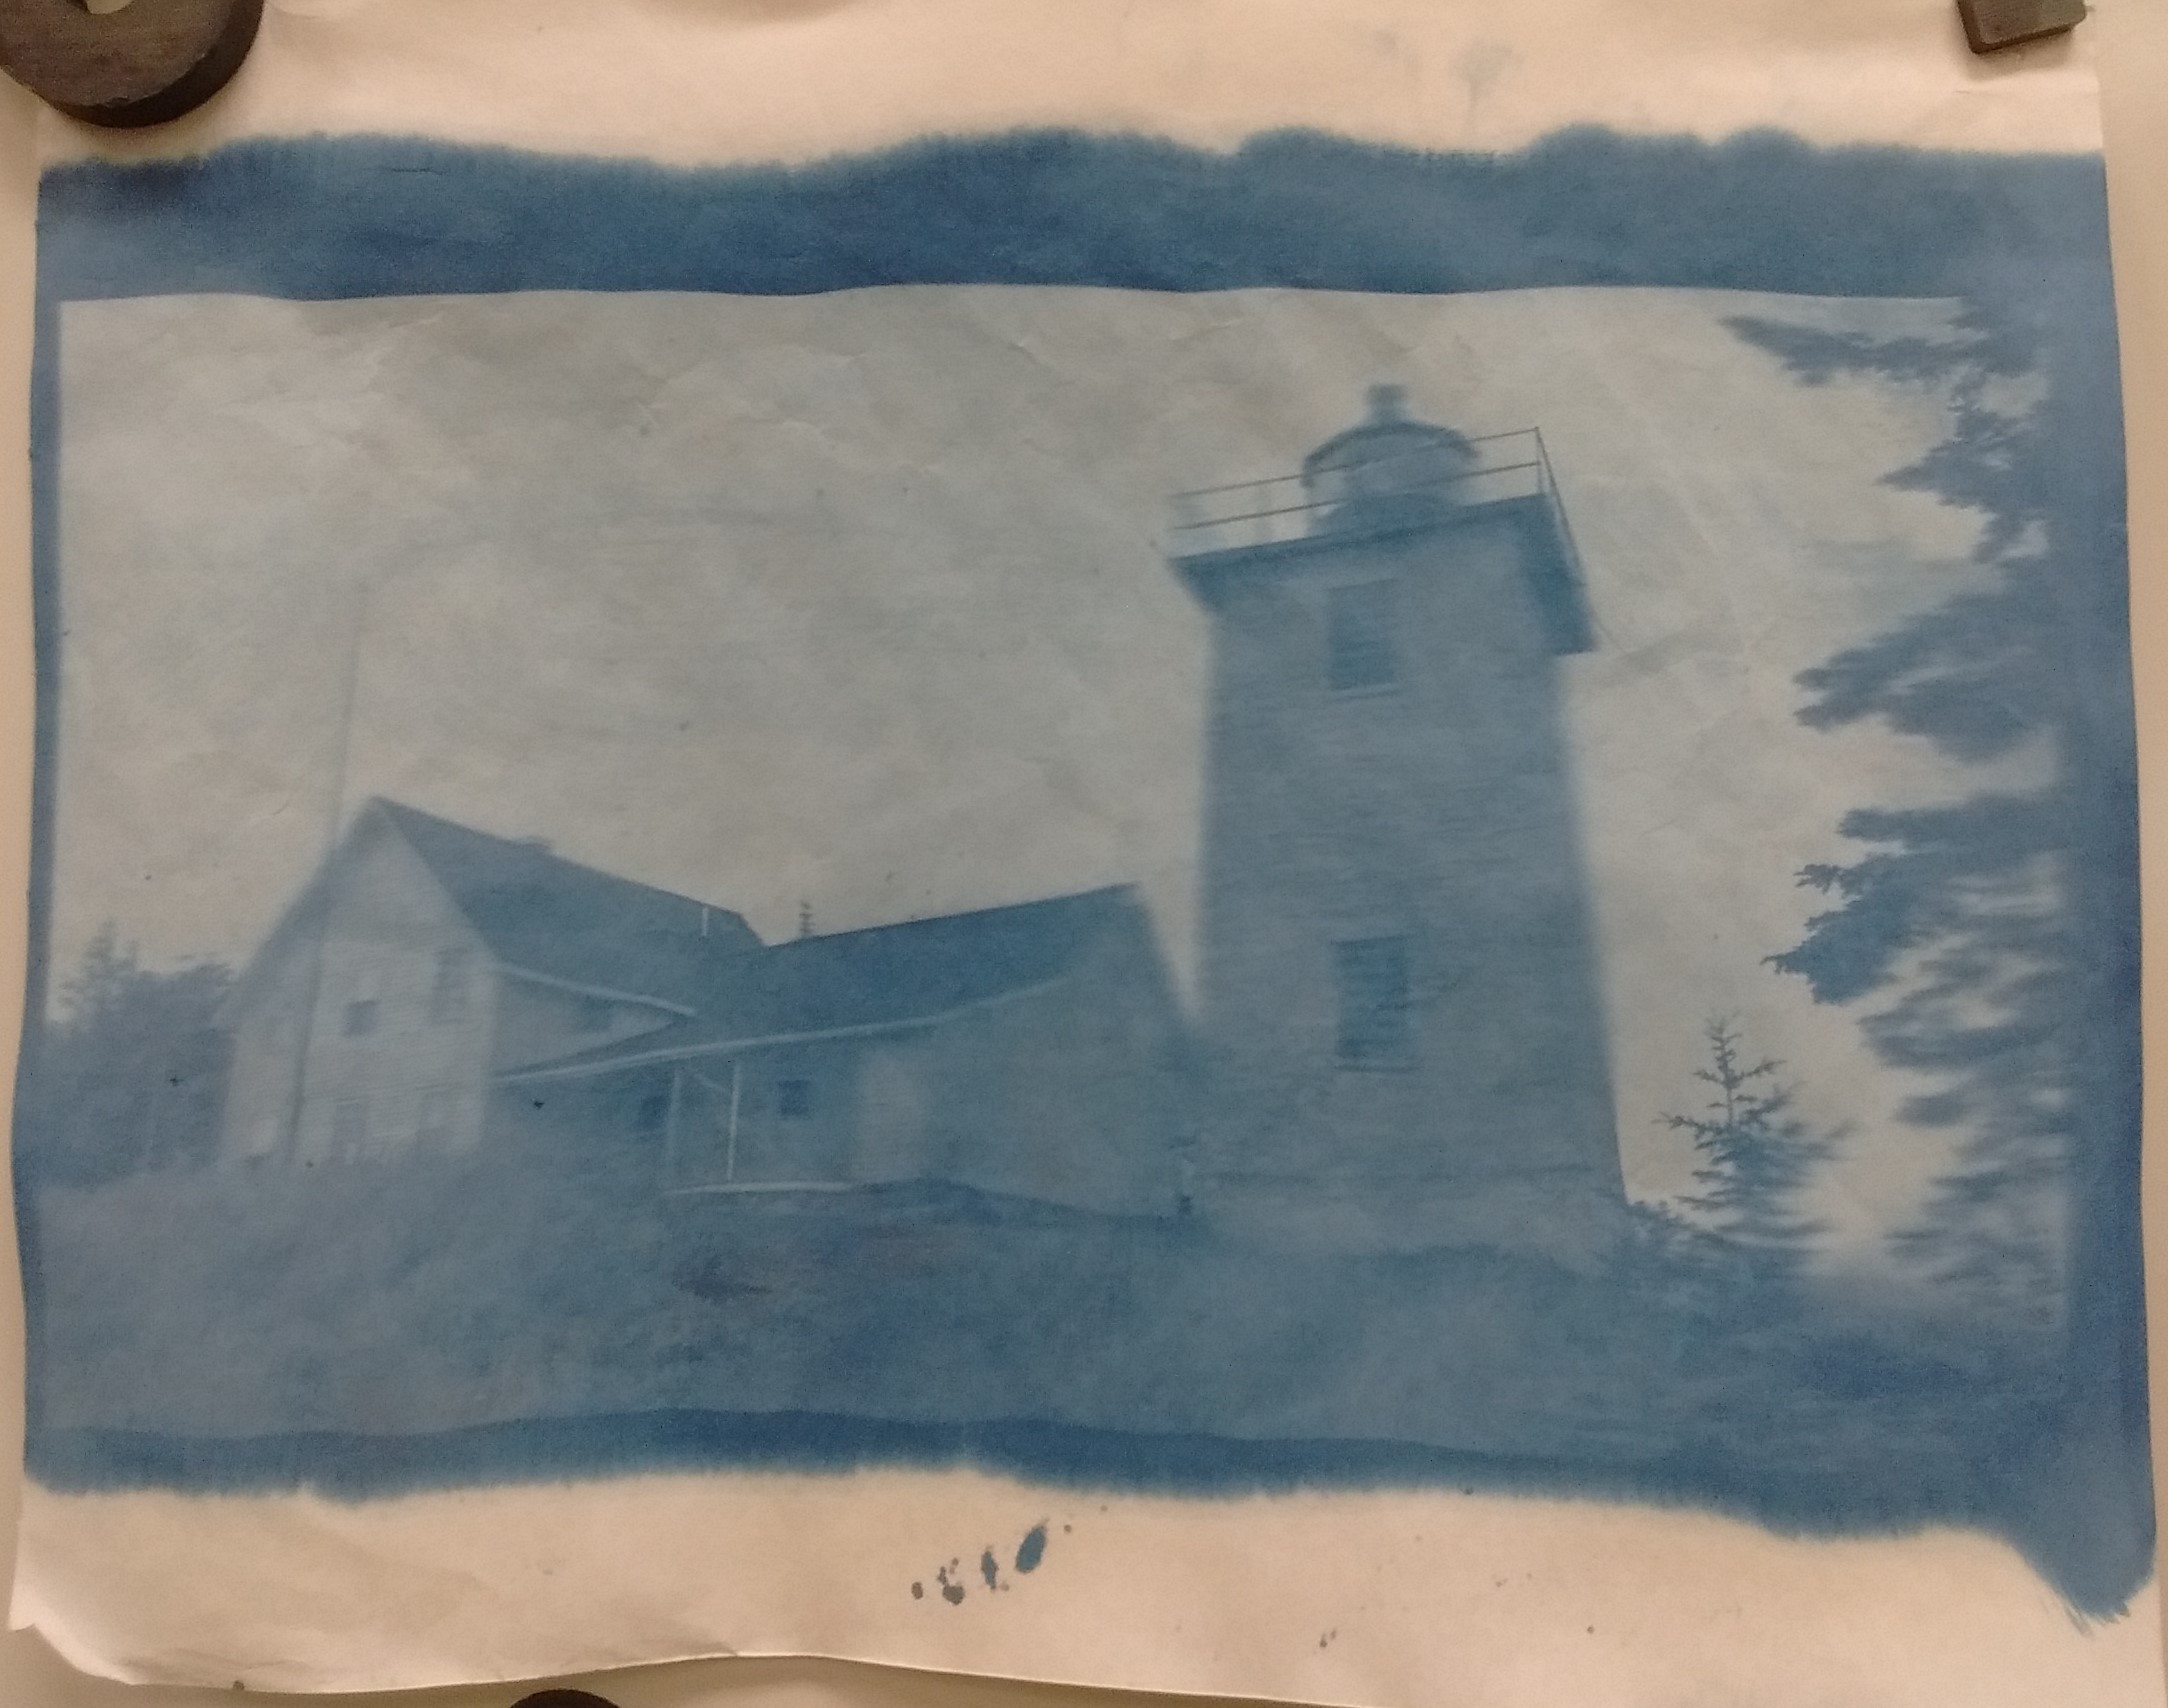
- The product of the chemistry in this lab is Prussian blue. It is iron(III) hexacyanoferrate(II) (Fe4[Fe(CN)6]). This non-toxic dye will stain hands and clothing but is otherwise harmless. The pigment is permanent and the cyanotype pictures you make will last as long as they are kept dry.
- Always close containers of chemical supplies when they are not in use.
- Wash hands thoroughly with soap and water before leaving the laboratory.
Procedure
This procedure provides you with some choices, depending on precisely what you are doing. You may be making a print on paper or on fabric, you may be using a photo negative or a design that you drew. Read the entire procedure through before you begin so you know what you want to do and what options you will use.
Making Sensitized Paper
This portion of the process involves a choice of paper and can involve variations in the application of the sensitizer chemicals. Be careful to record what you actually do. All measurements of solution volumes may be approximate. As long as you use a 1:1:1 ratio of the three solutions the procedure will work.
- Pull the shades to keep out sunlight and turn off fluorescent lamps. Any source of ultraviolet light will cause the color change. Light sources which do not emit UV are fine.
- Choose a type of paper to use. Common options include laboratory filter paper and various kinds of artist papers. These will vary in their ability to absorb liquid, resist wrinkling when wet, and hold up under washing.
- Decide how you would like to lay out the objects or photo negative you will be using. Mark your paper so you know how much of it will need to be treated in order to make the image you want to make.
- Using a plastic pipet measure out 1 mL of 1.0 M Fe(NO3)3 (iron(III) nitrate) solution and put it in a 50-mL beaker. Be careful not to let the pipets touch the solution you are making so that the stock solution bottles are not contaminated).
- Using a plastic pipet measure out 1 mL of saturated H2C2O4 (oxalic acid) solution and put it in the 50-mL beaker with the iron(III) nitrate.
- Using a plastic pipet measure out 1 mL of 0.45 M K3Fe(CN)6 (potassium hexacyanoferrate(III) or potassium ferricyanide) solution and put it in the 50-mL beaker with the iron(III) nitrate and oxalic acid.
- Swirl gently in the beaker to mix.
- Experience has shown that used brushes cause the applied solution to develop a blue color without exposure to light. This is likely because the used brushes contain activated sensitizer solution, which causes a chain reaction and activates the new solution being applied. Rinse your brush before use!
- Place your paper in a suitable plastic tub or on a piece of acrylic or plexiglass. Use a brush to lightly brush the paper with the sensitizer solution. Endeavor to spread the solution as evenly as possible. Try to avoid leaving puddles of liquid on the surface of the paper.
- Experiments have yet to be successful in drying the sensitized paper prior to making a print. Plan to use the wet paper immediately to make a cyanotype.
- Once your paper is ready cover with an opaque material (cloth or cardboard or otherwise) until ready to use.
Objects from which to Make Prints
There are a wide variety of ways in which this print-making process may be used to express your creative impulses. If you think of something interesting to try in addition to the following list then please tell your instructor so the list can be expanded! Record your choice and your goals for your print so it can be included in your report.
- A photo negative.
- A photo negative printed via photocopier on a transparency.
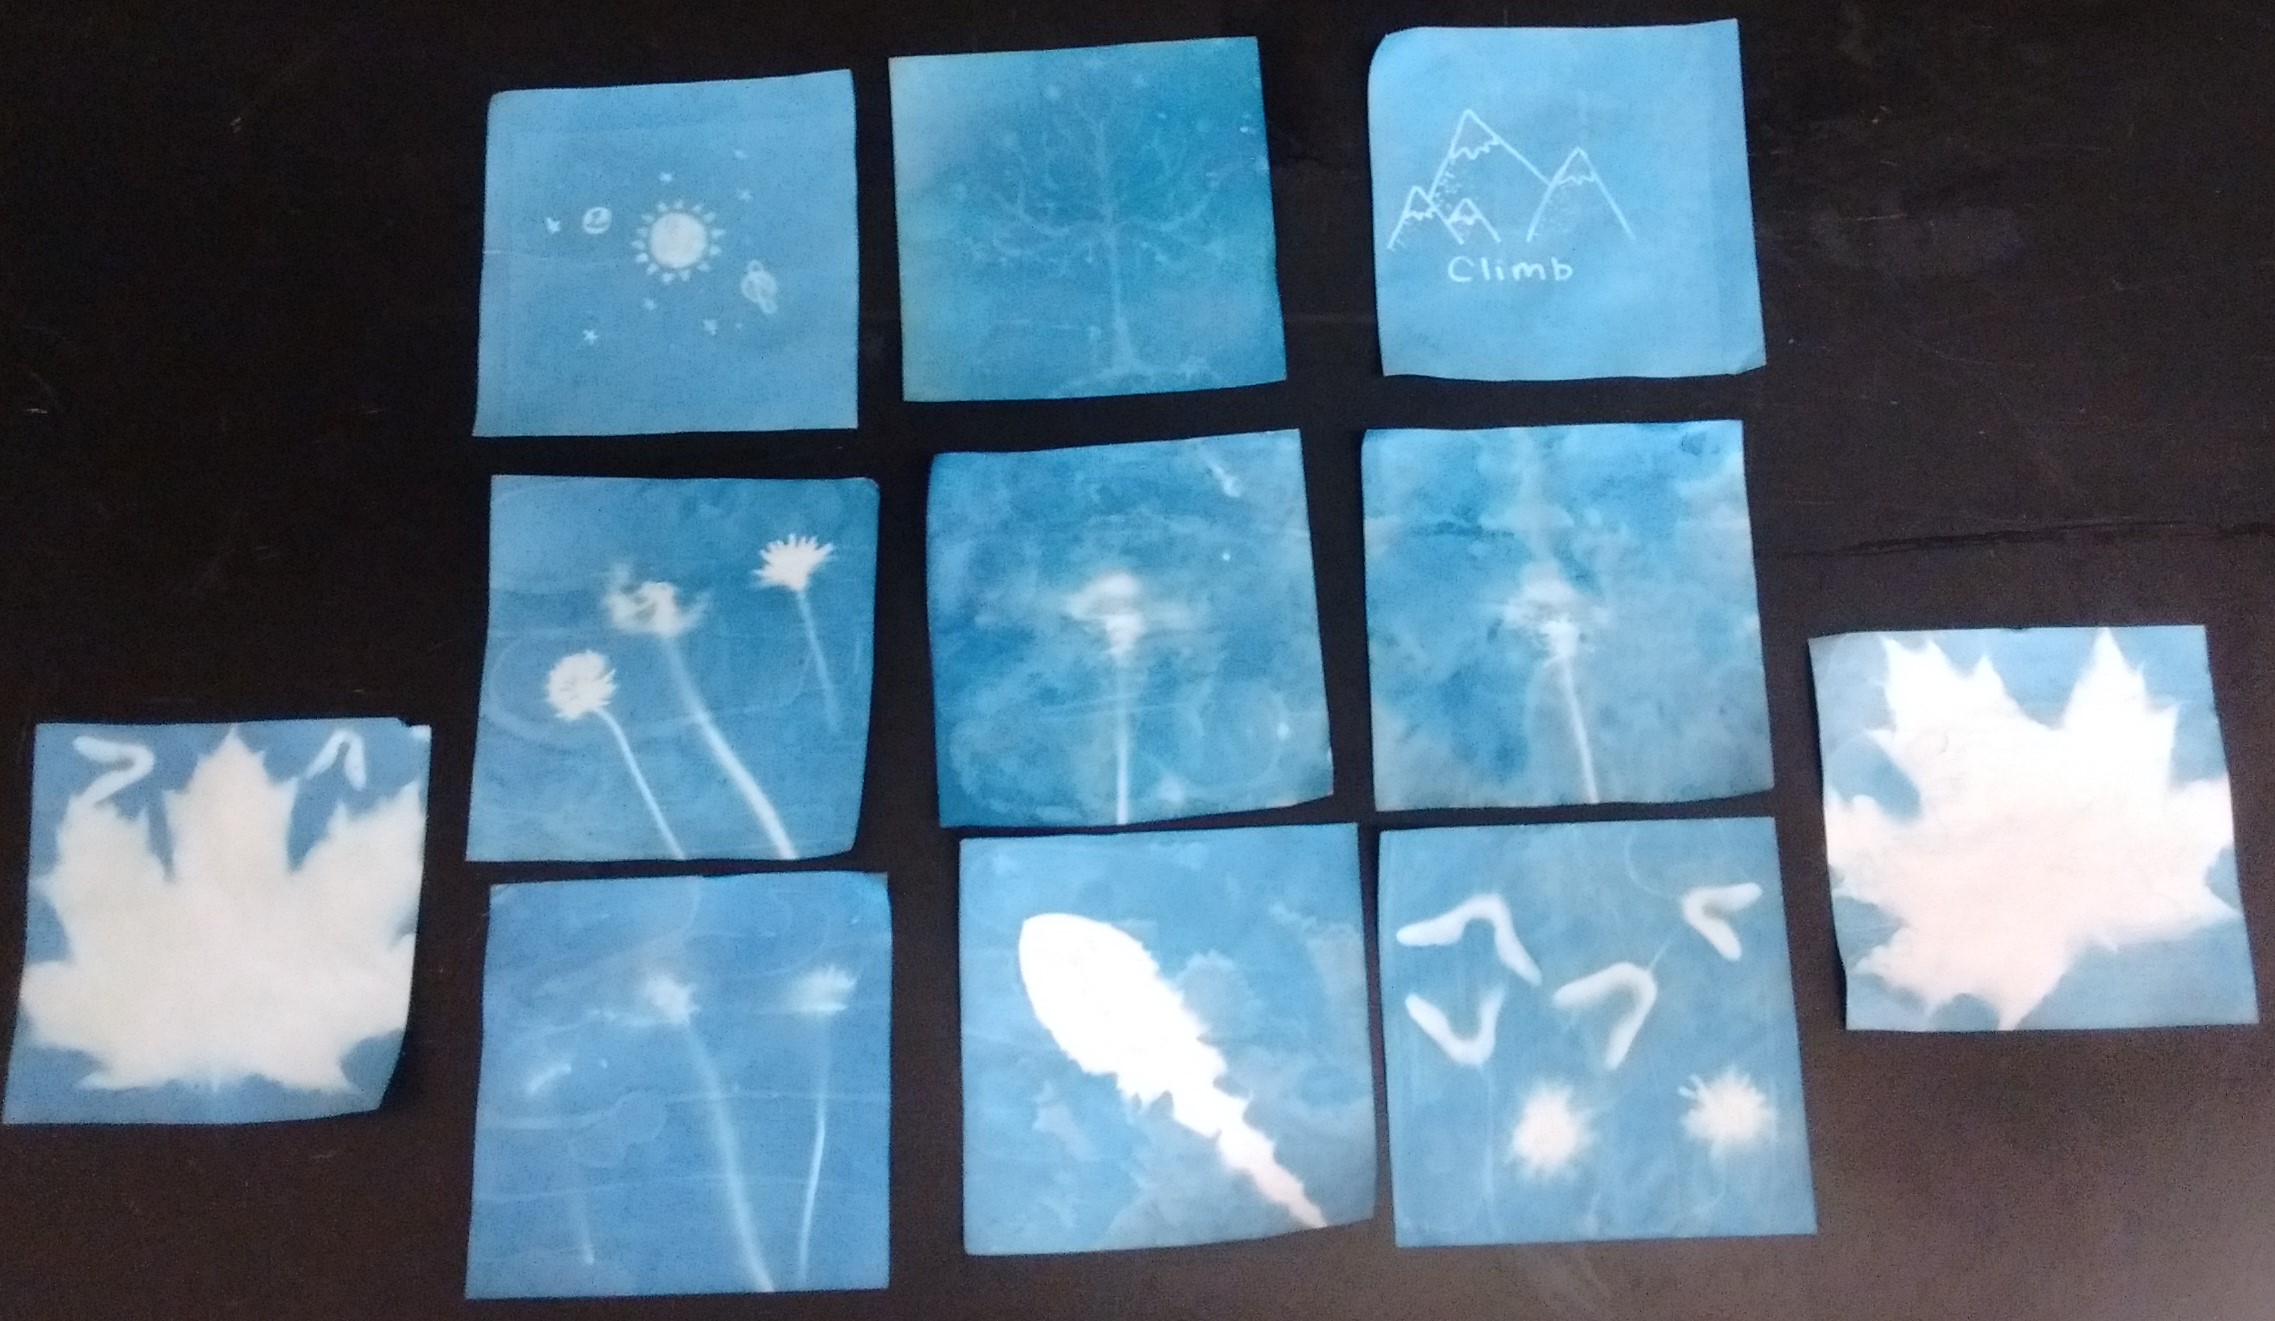
- A leaf, flower, or other natural object.
- A key, a ring, or other personal item with an interesting outline. For this and for a natural object an interesting print results from a pattern with gaps or partially transparent regions.
- A transparency with your own drawing, personal message, greeting card, or architectural plan.
- A paper cut-out of stenciled letters or shapes. Manila folders are opaque enough to block UV light well.
Making the Print
This portion of the process allows for a fair amount of creative variation. Record your exact procedure for your report.
- To use a photo negative simply place it in contact with the sensitized paper prior to exposure to UV light. If your negative was printed onto transparency material using a photocopier then the wet senstitizer chemicals should not damage it. If your negative is a photo negative from a film camera then place a clear transparency as a barrier on the sensitized paper prior to placing the negative on it. Alternatively, try drying the paper before using it.
- If you are planning to use sunlight to develop your print, place the treated paper on a piece of cardboard and cover with another piece of cardboard to exclude light. Carry outside or to an open window before proceeding.
- If you are using objects placed on the paper to make your print them place them on the sensitized paper in a shady location (or away from the UV lamp) and then expose them to the light.
- Depending on the strength of UV radiation from the sun or the brightness of the lamp used in the lab the development time may vary from less than 1 minute to 3 minutes. For a bright sunny day in a part of the year after the spring equinox and before the fall equinox a very short exposure is likely to suffice. A cloudy day or a day in the middle of winter, especially at northern latitudes, may require a long exposure. Ultraviolet lamps vary in their brightness and may produce dark images in a short time or it may require a longer exposure. Use your best judgement. When dark blue color appears it does so gradually but you will be able to watch it. As the green color of the sensitizer gives way to blue, cover the image when you consider it to be done. Overdevelopment will lead to dark blue paper with no image at all in some cases. The outcome is difficult to predict precisely in advance so your attention on your print is necessary in order to obtain a desirable result.
- Note: it is possible to use a UV lamp or the sun to expose some parts of the image more than others. Simply cover parts that you want to have less exposure or hold the lamp off to one side. The places with more UV exposure will be darker blue.
- Once you are satisfied with the amount of blue color development cover your image to exclude any more UV light. Rinse your paper off using a tub of clean water or with running water from the sink. This step removes sensitizer chemicals that have not yet reacted. The water-soluble sensitizer chemicals should wash off relatively easily and swishing it around in fresh water for a minute or two should suffice. Some sources say that rinsing for 10 to 20 minutes may be required so use your own judgement. Watch the color of the paper: if the green color completely disappears then rinsing is probably complete. Be careful because wet paper is delicate and easily ripped.
- To dry your paper blot it on paper towels by gently laying it on several layers of paper towel. Allow the towels to soak up some of the water. The paper can be allowed to dry naturally on a table top or by hanging it from a string tied between two posts or ring stands. Or a hair dryer may be used to speed up the process. Be careful not to let the dryer get too close to the paper as it can lead to browning of the paper due to the heat. Alternatively, an oven set to a low temperature may be employed. Heated drying has not generally given good results but if done carefully may be made to work.
- If your fingers become blue then use some baking soda and soap to wash them. The baking soda increases the pH enough to destroy the Prussian blue pigment and should allow you to remove the color from your skin.
Additional Art
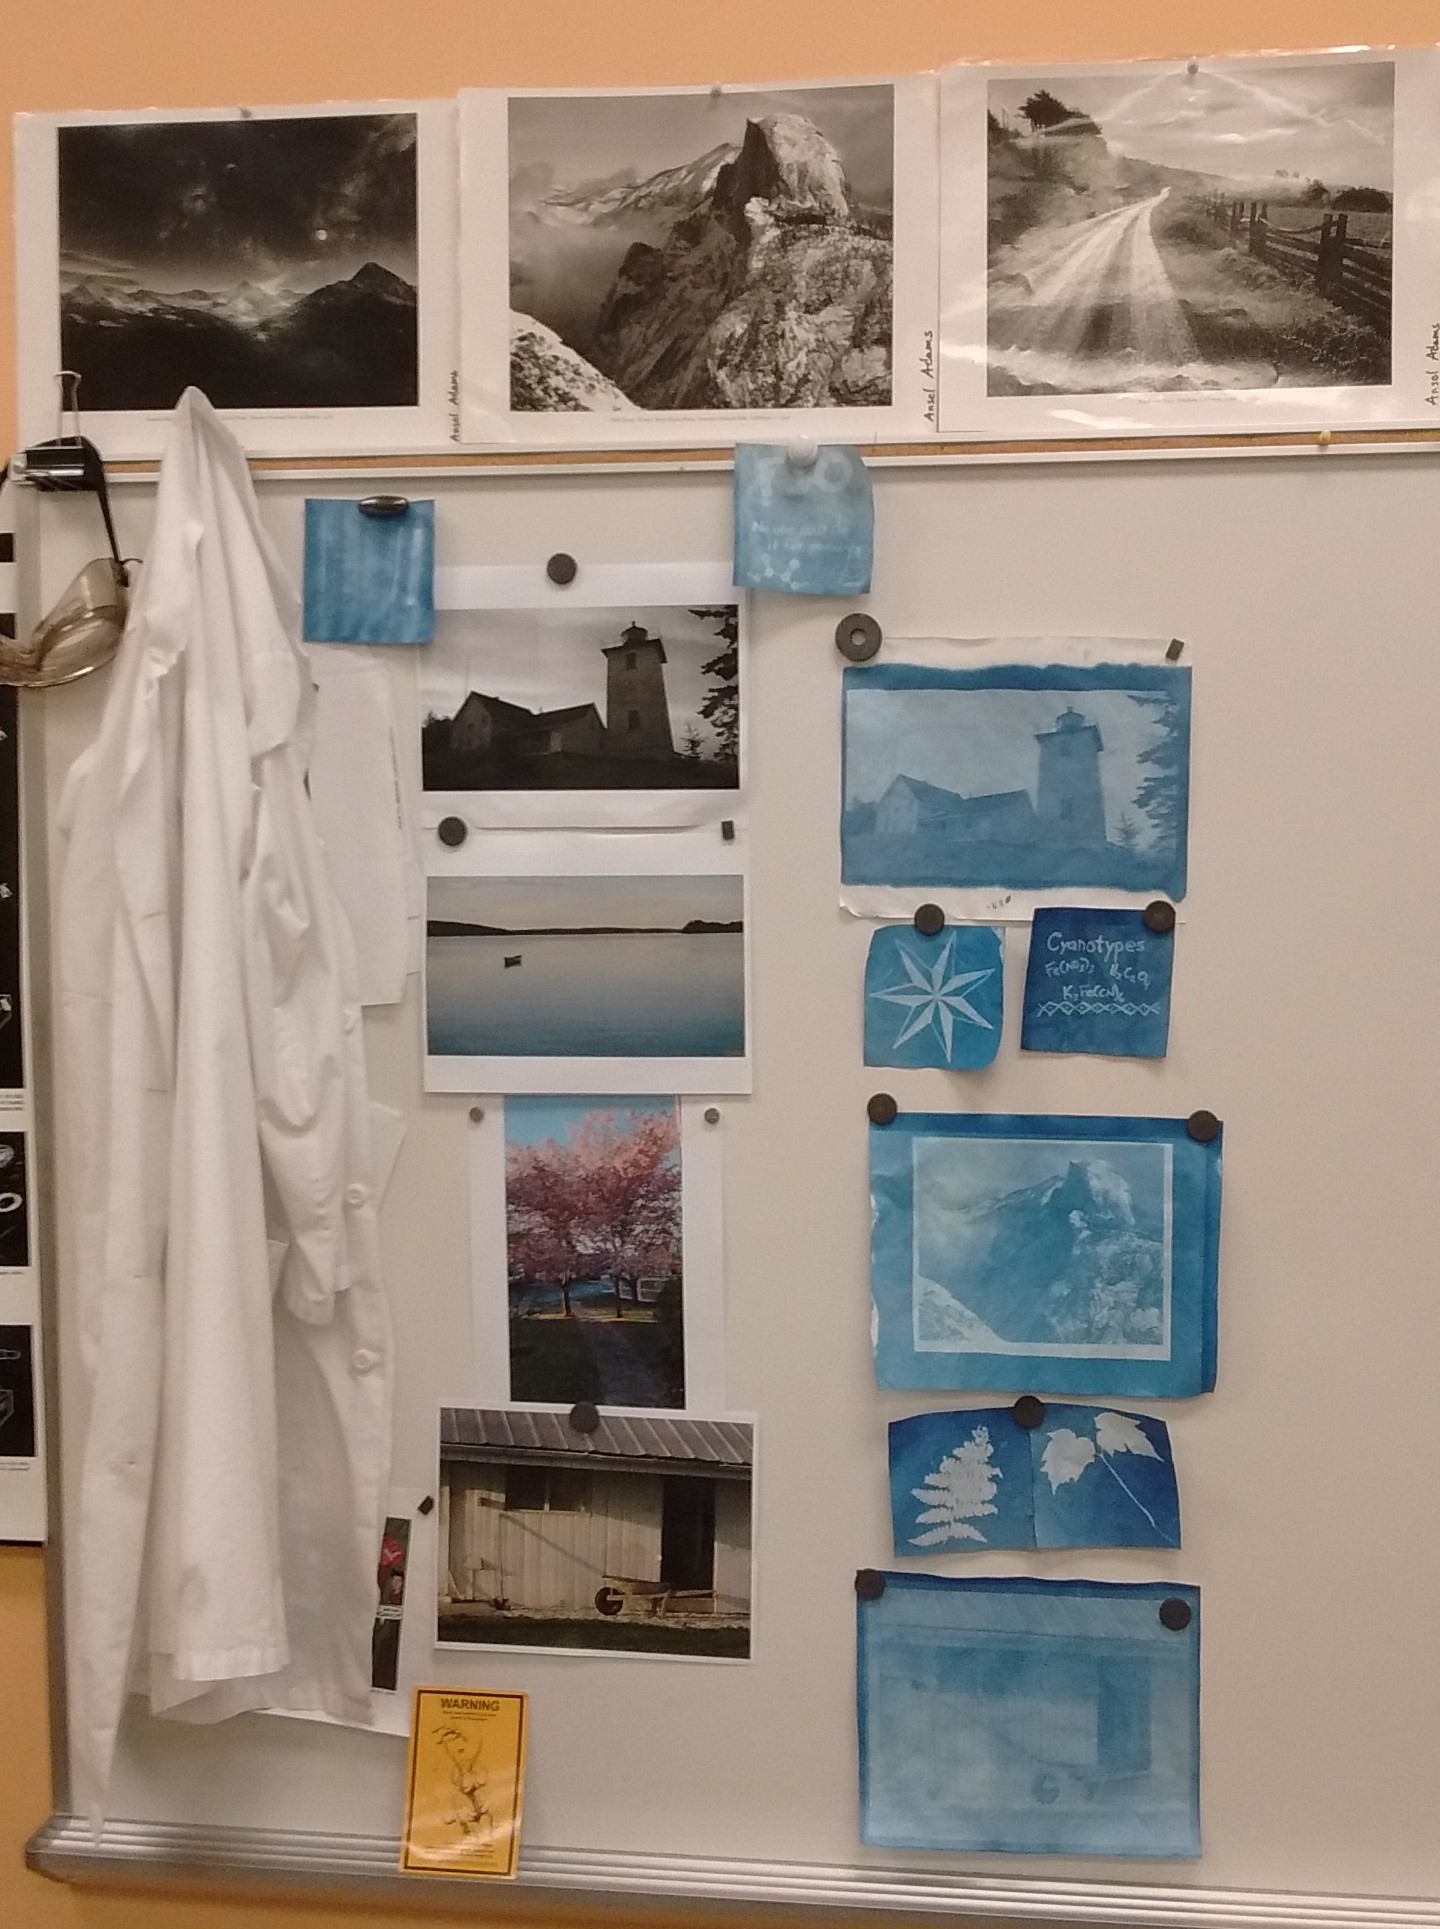
If there is time for a second attempt, try varying one of the initial conditions of the set-up to see what effect it has on the outcome. For example, you can change your method of application of sensitizer, choose another kind of paper, use the sensitized paper wet or dry, use the sun instead of the UV lamp or vice versa, mask the paper from the light source to control exposure on different parts of the paper, change the exposure time, move the object or negative you are printing partway through exposure. Record your method with meticulous notes and be prepared to share your choices and their outcome in your report.
Students may wish to expand the materials upon which prints are made. The procedure works very well to print onto cotton or even cotton-blend fabric. A white t-shirt is ideal. To print on fabric much the same procedure is used but a larger volume of sensitizer may be needed. Also, the sensitizer will tend to bleed through the fabric so measures taken to prevent exposure in those areas or to limit the spread of the sensistizer will result in better outcomes for designs which do not cover the entire piece of fabric.
Post-lab
Answer the following questions in a typed document.
- Evaluate the procedure. Were there any circumstances that you wish you had been told about before-hand? Was there anything that did not work as described? How would you improve this lab?
- Why is it that ultraviolet radiation caused the color change in this activity but visible and infrared radiation do not?
- Write an explanation of the chemical mechanism that allows the starting materials in this procedure to be transformed into Prussian blue by the action of UV light.
- Include a picture of your cyanotype with your report. In a paragraph or so, evaluate it for quality, artistic interest, and chemical success. Make sure your evaluation relates back to your procedure as you carried it out.
- There are a variety of ways that the cyanotype process can be modified. Some variables include: the relative amounts of the three sensitizer chemicals, the type of paper used, the application method to get the chemicals on the paper, the light source used, the length of time the paper is exposed to the light source. Given all of this variety how is making a cyanotype scientific? On the other hand, how is it actually an example of the work of an artist?