In this home-inquiry lab you will explore the growth of
crystals. Mineral substances, when dissolved in water, will
often form crystals as the water evaporates or cools. These
crystals can take a variety of forms depending on the
substances they are made of and on the conditions under
which they grow. Although crystal formation may appear to
be organic there is nothing living. Instead, atoms and
molecules naturally stack together in regular repeating
patterns, which when grown large enough, become obvious
without any magnification.
Materials
School Lab
Salt (NaCl)
Water (H2O)
Powerdered Prussian Blue pigment
Household Ammonia (5 - 10% NH3 by mass dissolved in
water)
Heat-proof cups or jars large enough to hold your
creation
Pipe cleaners
String or floral wire or wire ornament hangers
(optional)
Pencil or popsicle stick
Paper towel or old newspaper
Background
Solubility
Water is a substance that is easy to take for granted. We
require it to live but it usually plays the role of a
theatrical prop, easily ignored in the excitement of events
going on around it. The chemical truth of the matter,
though, is that water is a miraculous material. It is safe
and non-toxic but still it is one of the most powerful
solvents known to science. So many substances easily
dissolve in water that it is fairly called the universal
solvent. For example, salt (NaCl) and sugar (C12H22O11)
both dissolve in water. These are very different kinds of
chemical substances, for all that they look alike. Salt is
an ionic compound of a metal and a non-metal and the bonds
between its atoms are among the strongest known. Salt has a
very high melting point as proof of this strength:
801°C (1,474°F). When salt melts the bonds between
the atoms must be broken—the high melting point shows
that a large amount of energy is necessary to break these
bonds. Sugar is a compound of non-metal atoms bound by
covalent bonds. The bonds holding the atoms together are
reasonably strong but they are not broken when sugar melts.
The bonds that do break are based on the weak forces of
attraction holding one molecule to the other in a solid or
liquid form. As proof of these weaker bonding forces, sugar
melts (if you haven't burned it first) at 186°C
(367°F). Despite their differences, salt and sugar are
both very soluble in water.
Although they both dissolve in water, there is a difference
between sugar and salt in how well they dissolve. Salt will
dissolve in water only until it makes up about 26% of the
solution by mass. That is, when 26 g out of 100 g of the
solution are salt. The other 74 g are water. Sugar, on the
other hand, will dissolve until it makes up 40% by mass of
the solution. Sugar is much more soluble than salt.
Different substances all have their own unique amounts that
represent the maximum mass that will dissolve in a given
amount of water. When the maximum amount of any substance
is dissolved in water we call the solution saturated.
There is an activity available in
which students can explore solubility as a function of
temperature in a pencil-and-paper exercise in which they
put data on a graph and answer questions about it. Find it
on my site
here. Saturated solutions will not allow any
more of the dissolved material to dissolve. Additional
solid that is added appears to remain at the bottom of the
container, unchanged. Chemists measure the solubility of a
substance based on its concentration when the solution is
saturated. Substances with higher solubility make saturated
solutions with larger dissolved masses.
Solubility is also subject to changes in temperature.
Gases, such as oxygen (O2), dissolve better in cold
water than in hot water. Solids, on the other hand, usually
have a higher solubility in hot water than in cold water.
For example, at a temperature of 90°C a saturated
solution of sugar will be 45% sugar by mass instead of 40%.
By making a solution at a high temperature it is possible
to dissolve more solid than at low temperature. Compared to
the amount that dissolves at room temperature, a solution
made at high temperature is supersaturated. A
supersaturated solution is one in which more material is
dissolved than the usual maximum amount at a given
temperature. When the temperature falls as the solution
cools off the extra dissolved material will form crystals.
page break
Crystal Formation
Image source: Aaron
Keller
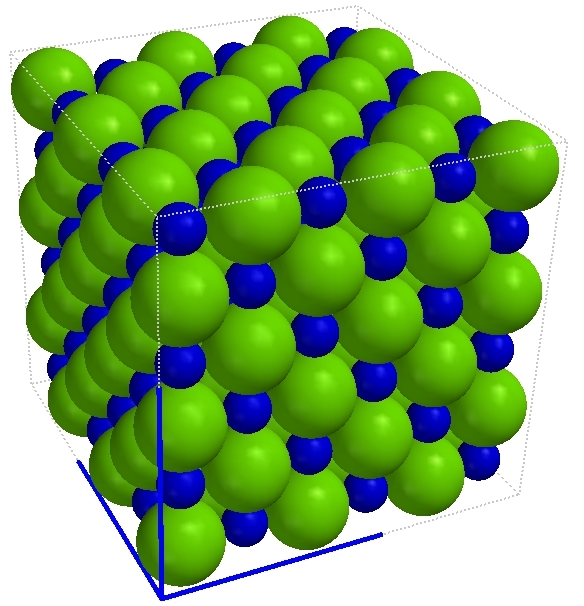
Salt at the Atomic Level
Image source: Aaron
Keller
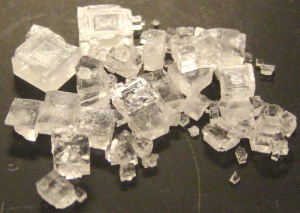
Salt Crystals Showing Typical Square Shape
A crystal is a special solid form of a pure substance that
has a regular three-dimensional geometrical shape. Each
substance in the world has its own unique crystalline
shape.
The shapes of crystals do fall into groups that can be
readily classified. Some are cubic, others are octahedral,
rectangular solids, or other shapes. The shape of a crystal
provides information about how the atoms or molecules in the
crystal are arranged. At the molecular scale atoms in a
crystalline solid are arranged in a regular repeating pattern
which gives rise to the overall shape we see.
Crystals will form from a saturated solution left out on a
table simply because the water evaporates away. When there
is less water, less of the solid can remain dissolved. As a
result, the solid begins to form crystals. These crystals
may be so small that they appear to be like a fine powder.
Visible crystals form when crystallization is slow. If
evaporation takes a long time then bigger crystals have
time to form. In the picture of salt crystals at right it
is possible to see that they all have the typical square
shape of salt crystals. Their different sizes are a result
of different amounts of time spent growing as the water
evaporated. This type of crystal formation is one that the
in-class portion of this activity addresses. The
‘magic trees’ that you grow are made of
crystals of salt that form as a result of the rapid
evaporation from a piece of paper soaked in the solution.
Another way in which crystals can form is when a solution
which is saturated at a high temperature is allowed to cool
down. As it cools the solution becomes super-saturated and
the excess solid crystallizes out. If the solution cools
quickly then the crystals that form will be small. On the
other hand, if the solution is allowed to cool more slowly
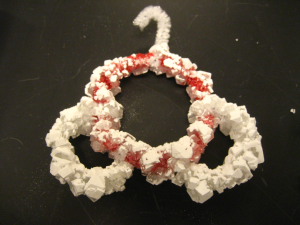
then this will allow larger crystals to form. In the at-home portion of
this activity borax will be dissolved in water at high
temperature. Next it will be allowed to cool so that
crystals may form. It is usually possible to create very
attractive decorative ornaments by allowing the crystals to
form on pipe cleaners which have been bent into pleasing
shapes. For example, see the pictures at left.
Crystallization and the ‘Magic Tree’
The paper trees you will make in the in-class portion of
the lab may form a strange and wonderfully different kind
of crystal. Salt crystals naturally form in cubic shapes
but when the mixture of water, salt, ammonia, and Prussian Blue pigment is just right then they form a different type of
crystal called a dendritic crystal. Dendritic crystals have
a branched form which looks like tiny trees. Solids crystallizing out of a solution as the water evaporates away may form dendritic crystals just because they form very quickly. The dendritic crystal is in actually a collection of extremely tiny crystals, each growing separately from the others and never growing very large. If evaporation is very fast, crystals may form branching, tree-like structures. Another reason a solid may form dendritic, rather than typical crystals, is when an anti-caking agent is added. For example, commerical salt sold in grocery stores usually include very small amounts of chemicals that interefere with normal crystal growth. These are safe to eat and keep the salt free-flowing. One of these, Yellow Prussiate of Soda, is a close relative of one of the ingredients you will use to make your magic trees, the Prussian Blue pigment. (Canning and Pickling Salt does not include an anti-caking agent).
In this lab the salt crystals form dendritically because of some complex interactions between the
ingredients. The Prussian Blue pigment is a chemical called ferric
hexacyanoferrate: Fe4[Fe(CN)6]3
(also called iron(III) hexacyanoferrate(II)). When in basic
solution, as in ammonia, some of the iron(III) ions
(Fe3+) precipitate
as iron(III) hydroxide (Fe(OH)3). The iron(III)
hydroxide is brown and looks like mud and when it forms the
solution loses its blue color. Once this happens the hexacyanoferrate
ions are free in solution and when they attach to the
surface of a growing crystal of salt they stick very
tightly. Because they do not come off easily, and because
they prevent the crystal from growing on surfaces where
they are stuck, the hexacyanoferrate ions prevent large
crystals from forming and also prevent crystals from being
able to stick together. In this way their presence prevents
salt from growing its normal cubes and instead brings about
a growth of crystals that appears almost organic, as if a
living creature were developing before our eyes. In fact, the crystals are called dendritic precisely because they resemble incredibly tiny trees (the word is based on the Greek word for tree).
page break
In-class Lab Procedure
Safety and Disposal
The following list does not cover all possible hazards,
just the ones that can be anticipated. Move slowly and
carefully in the lab: haste and impatience have caused more
than one accident.
If you choose not to wear safety glasses you are
choosing to sit out the lab.
Prussian Blue pigment is non-toxic but should not be consumed.
Ammonia is a household cleaner with a high pH (it is
alkaline). As such it is corrosive to skin and eyes and all
bodily contact should be avoided. Wash hands thoroughly
after accidental contact. Remove contact lenses and rinse
eyes for fifteen minutes in case of contact with eyes.
All materials are safe to go into the trash, once dry.
To clean crystals out of dishes simply rinse with plenty of
water. Small amounts of vinegar will remove brown deposits.
The Challenge
In this in-class portion of the lab you will investigate
which combination of ingredients is required to create
beautiful crystal trees covered in delicate dendritic salt
crystals. Also, you will attempt to determine what the role
of each ingredient is in the creation of the unusual
crystals.
Part I: The Paper Tree
In this part you will read and follow instructions on how
to make a simple paper cone which will stand up well even
when wet.
Use a glue stick to glue a piece of construction paper
to a piece of manila folder. Press firmly to make a strong
bond.
Cut out a circle with a 12 cm diameter from the
construction paper reinforced with manila folder. Cut the
circle in half on a diameter. Fold the half-circle into
quarters and tape the cut sides together. Open this shape
out into a cone, shaping it with your fingers until it is
self-supporting.
If desired, cut out the shapes of tiny trees or other things using the same manila/construction paper material. The more edges and points these shapes have, the more crystal growth you will see on them. The shape should be able to lean against the cone without falling down, even when wet.
Part II: The Basic ‘Magic Tree’
Published recipes for growing a ‘magic tree’
provide the information that the following ingredients are
needed: salt, water, household ammonia, and Prussian Blue pigment
solution. Most of these sources say nothing about the
purpose of each of the ingredients. By setting up
experiments in which you leave out one or more of these
ingredients you should be able to learn how they work
together and explain the role of each component.
What follows is a generic recipe meant to produce a total
volume that will not overflow a typical petri dish. You
will be asked to plan a series of experiments in which you
choose how to vary this basic recipe, by leaving out
different ingredients, in order to figure out what is going
on. In order for you to be familiar with the procedure and
so that you will be able to create the basic ‘magic
tree’ first follow the recipe below to create your
‘magic tree’. Afterward you will discuss your
plans with your lab partner and your teacher about how to
set up the experimental portion.
Obtain a 100-mL beaker.
Using a graduated cylinder, measure out 20 mL of tap
water. Add it to your beaker.
Using a graduated cylinder, measure out 5 mL of
household ammonia solution. Be careful handling this liquid
as it is corrosive. To measure it, pour a little into a
clean small beaker (50-mL size). Then measure the solution
by pouring from the beaker into the graduated cylinder. Do
not pour directly from the bottle into the graduated
cylinder! Pour any excess solution back in the bottle and
put the cap back on the bottle.
Add the ammonia solution to the water.
Obtain a weighing dish and a small lab scoop. Use a digital lab balance to measure out 0.10 grams of powdered Prussian Blue pigment. Remember to put the cap back on the bottle.
Add the powder to the beaker. Use a wash bottle and a very small amount of water to wash all of the powder into the beaker. Your teacher can show you how to do this effectively.
Stir the ingredients with a glass stirring rod.
Note: After you add the powdered Prussian Blue pigment to the water and ammonia you may notice that something strange has happened after a few minutes.
You are witnessing a chemical reaction between the iron
ions in pigment and the hydroxide ions from the
ammonia solution. Tiny, solid, brown crystals will form and
the solution will lose its blue color. Pause to observe this.
Obtain a petri dish (just the top or bottom only) and
set the empty petri dish in a safe place,
specified by your teacher. Do this before you add liquid to the dish. Create a slip of paper to place
partly under your dish that has your name, class period,
and today’s date on it. This is so you can know which
one is yours later.
Slowly pour the solution you made into the petri dish.
Measure out 12 grams of salt (sodium chloride,
NaCl) using a weighing dish and a 3-beam balance. Do not forget to add the mass of the weighing dish! Add it to your petri dish and
stir. You should notice that not all of the salt will
dissolve. This is on purpose because it ensures that the
solution you make is absolutely saturated with salt.
Place your cone in the middle of the dish. If you add a little tree or other shape be careful
to lean it against the cone it so it won’t tip over. Watch for a few
minutes as the water begins to creep up through the
construction paper. Within 24 - 48 hours this recipe will cause the
cone to be completely covered with beautiful white
crystals! The speed depends on the humidity in the room.
You could also use a little food coloring to
decorate it your cone or tree further. Simply dab a drop of food coloring on
the tip of any branch of your tree to add some color to the
crystals that grow on that branch.
Once the crystals have finished forming, take some photos for your report.
Next, you will do an experiment to see what happens when you leave out one or more of the ingredients.
Part III: The Experiment
This is the most important part of the in-class
lab. Once you know the recipe for how to make the
‘magic tree’ you can vary that recipe in order
to figure out the purpose of each ingredient. Work together
with your lab partner and your teacher to make a table
recording the variations you will make to the recipe. There
are three useful ways to vary the recipe to isolate
the purpose of each ingredient by leaving out one or more
of them. Make a plan, write it in your lab notebook, share
it with your teacher to get some feedback, then carry out
your plan. Remember to keep the total volume of liquid a
constant for all trials that you set up. For any trials
including powdered Prussian Blue pigment you will need no more than 0.10 grams.
Clearly label each trial with a description of the
ingredients, your name, your lab partner’s name, and
the date and time. Over the next 1 to 3 days take time to
look at and write down observations about your experiments
in your lab notebook.
To help you get ideas for what to do, here are some things you will need to take time to observe:
Find out what crystals of salt look like when they are unmodified by additional ingredients. You will need only salt and water to find out.
Find out what happens if you leave out the Prussian Blue pigment but include everything else.
Find out what happens if you use the Prussian Blue pigment but leave out the ammonia.
At Home Lab Procedure
Safety and Disposal
The borax should not be consumed. Keep away from pets
and small children, who may put the ornaments in their
mouth.
Take pains to be neat and tidy with the borax. It is
safe to use in the kitchen in your usual cooking pots and
with your usual utensils provided you rinse them off very
well. Borax is a cleansing agent and can be used in the
kitchen to clean dishes. Like any cleaner, it should not be
consumed. Clean all surfaces thoroughly to prevent
accidentally consuming borax.
Because this craft involves the use of boiling water
any small children who are helping should be assisted by
someone old enough to use the stove safely.
There are no concerns about the disposal of the
materials in this activity. All un-used materials may be
thrown in the trash and excess borax solution may go down
the drain.
Borax Crystal Ornaments
For this at-home experiment you will actually engage in an
arts and crafts activity that takes advantage of scientific
knowledge. You will be able to express yourself creatively
while also learning about how solubility varies with
temperature and how crystallization can occur when a hot,
concentrated solution cools.
Part I: Making Ornaments
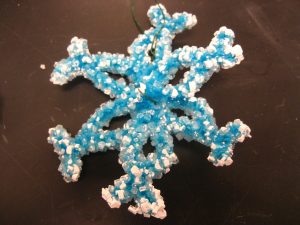
Use your imagination to create seasonal ornaments by
shaping pipe cleaners into whatever shape you like. Make a
snowflake or a bow. If you would like to help decorate the
chemis-tree in your teacher’s room then make an
ornament in the shape of a piece of chemical glassware or a
molecule and bring it to school.
After shaping your ornaments tie a string to the point
from which you’d like to hang it. Or use floral wire
or ornament hangers to make a hook. Attach the hook to the
top of your ornaments. Alternatively, just bend one end of
the pipe cleaner into a hook shape.
Obtain as many heat-proof containers as the number of
ornaments you would like to make. They should be large
enough that when you hang the ornament by its string or
hook the ornament can hang without touching the sides or
bottom. Be sure that they can safely be completely covered
with boiling-hot water.
Hang your ornaments in your containers by suspending
them from a popsicle stick or a pencil.
Most mugs are about a cup and a half in volume. Pint
mason jars are two cups (1 pint = 2 cups). Total up the
volume of borax solution you will need to make the
ornaments you have planned.
Part II: Growing Crystals
To make the super-saturated borax solution you will
need boiling water. For every cup of boiling water you use,
add 6 tablespoons of borax powder. Mix up the solution by
boiling the total amount of water in a pot on your home
stove. Measure out the water based on the total you
calculated previously.
Measure the borax powder into a cup while you wait for
the water to boil.
Once the water is boiling remove it from the heat. Wait
a moment or two for the bubbles to stop coming up to the
surface. Slowly add the borax powder to the hot water.
Sometimes adding a finely divided solid to very hot water
will cause it to come to a boil very quickly. Be careful!
Stir the solution with a metal spoon until all of the
borax dissolves. If any borax remains at the bottom without dissolving then pour the liquid into another container and leave the solid behind. You do not want any solid material left at the bottom of your crystallization containers.
Remove an ornament from its container. Add the hot
borax solution. (Be careful pouring boiling-hot water!)
Replace the ornament in the solution, being careful not to
let it touch the sides or bottom.
By the next day your ornaments should be covered with
beautiful clear crystals. Take them out of the solution and
set them on a paper towel or some used newspaper to dry.
Borax is water soluble so don’t let them get wet
after they dry off.
Report
Answer the following questions in a typed report. Use a
numbered question and answer format. Much of it can be
answered by carefully reading the introductory text in your
lab handout. Other questions depend on your lab
experiments, the results of those experiments, and your
interpretation of those results. In order to deepen your
understanding of the material plan to view the material
found at the links in some of the questions below.
What does it mean to say that a solution is saturated?
See this video for additional explanation: https://youtu.be/JQRIlS9lNdg
Use the same video as a source to help you to define
what a supersaturated solution is.
Which of the two lab activities you did involve a
solution that was saturated at a high temperature? Was the
solution super-saturated when it cooled off? Explain.
Where is borax found and what are some of its many
uses? Also, what will happen to the color of your crystals
when you put them away to store them until next year? Read
about it here: http://www.minerals.net/mineral/borax.aspx (or
use this shortened URL to go to the same page: http://goo.gl/wrPwbs).
What is the usual shape of salt crystals and how do
they grow? For a useful link about naturally-occurring salt
crystals, take a look at this page: http://www.minerals.net/mineral/halite.aspx
(or use this shortened URL to go to the same page:
http://goo.gl/e0YX7R).
For this question insert photos of your 1. ‘magic tree’ and 2. your modified trials.
For this question insert photos of your own homemade borax
ornament(s).
Based on your in-class experiments, what is the point
of having salt in the mixture used to make the ‘magic
trees’? For a trial with just salt and water,
describe what the crystals looked like and explain why they
looked that way. Read the introduction to the lab for help with this.
How do the ammonia and the Prussian Blue pigment work together
to make the ‘magic trees’ work? Cite relevant
results from trials which left out one or the other or both
of these ingredients. Also, read the introduction to the lab for help with this.
What is dendritic crystal growth and how was it demonstrated in the in-class portion of the lab? Read the introduction to the lab for help with this.
In your opinion, can science be artistic or creative?
Can creative work use the benefits of scientific knowledge?
How?
Grading
Answer the questions in the report section of this lab
handout (above) in a typed document.
page break
page break
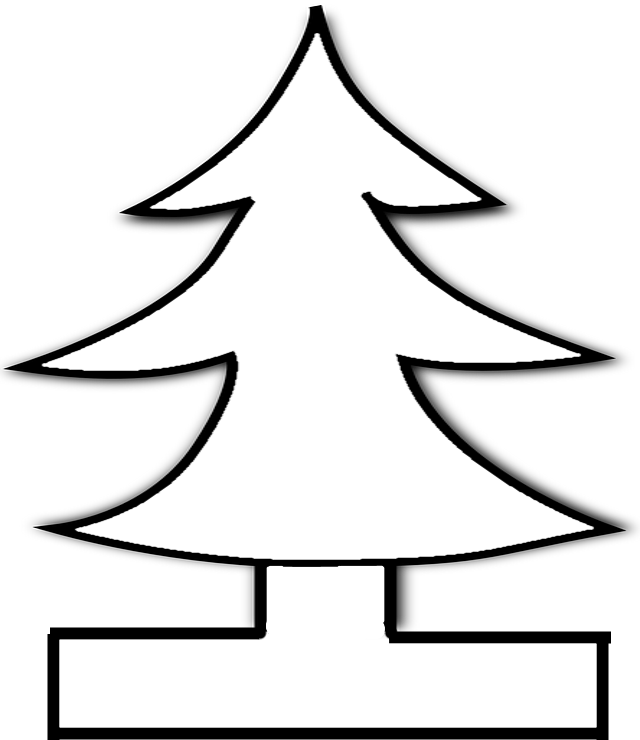
Template for the Crystal Tree
Sources
Bode, A. A. C.; Vonk, V.; van den Bruele, F. J.; Kok,
D. J.; Kerkenaar, A. M.; Mantilla, M. F.; Jiang, S.;
Meijer, J. A. M.; van Enckevort, W. J. P.; Vlieg, E.,
Anticaking Activity of Ferrocyanide on Sodium Chloride
Explained by Charge Mismatch. Crystal Growth &
Design2012,12 (4),
1919-1924.
Davidson, C. F.; Slabaugh, M. R., Salt Crystals-Science
behind the Magic. Journal of Chemical Education2003,80 (2), 155.
Dorazio, S. J.; Brückner, C., Why Is There Cyanide
in my Table Salt? Structural Chemistry of the Anticaking
Effect of Yellow Prussiate of Soda
(Na4[Fe(CN)6]·10H2O). Journal of Chemical
Education2015,92 (6),
1121-1124.
staff, J. C. E., How Does Your Garden Grow?
Investigating the "Magic Salt Crystal Garden".
Journal of Chemical Education2000,77 (5), 624A.
Katz, D. A. Magic Tree: An Explanation.
http://www.chymist.com/Magic%20tree.pdf (accessed April 27,
2016).
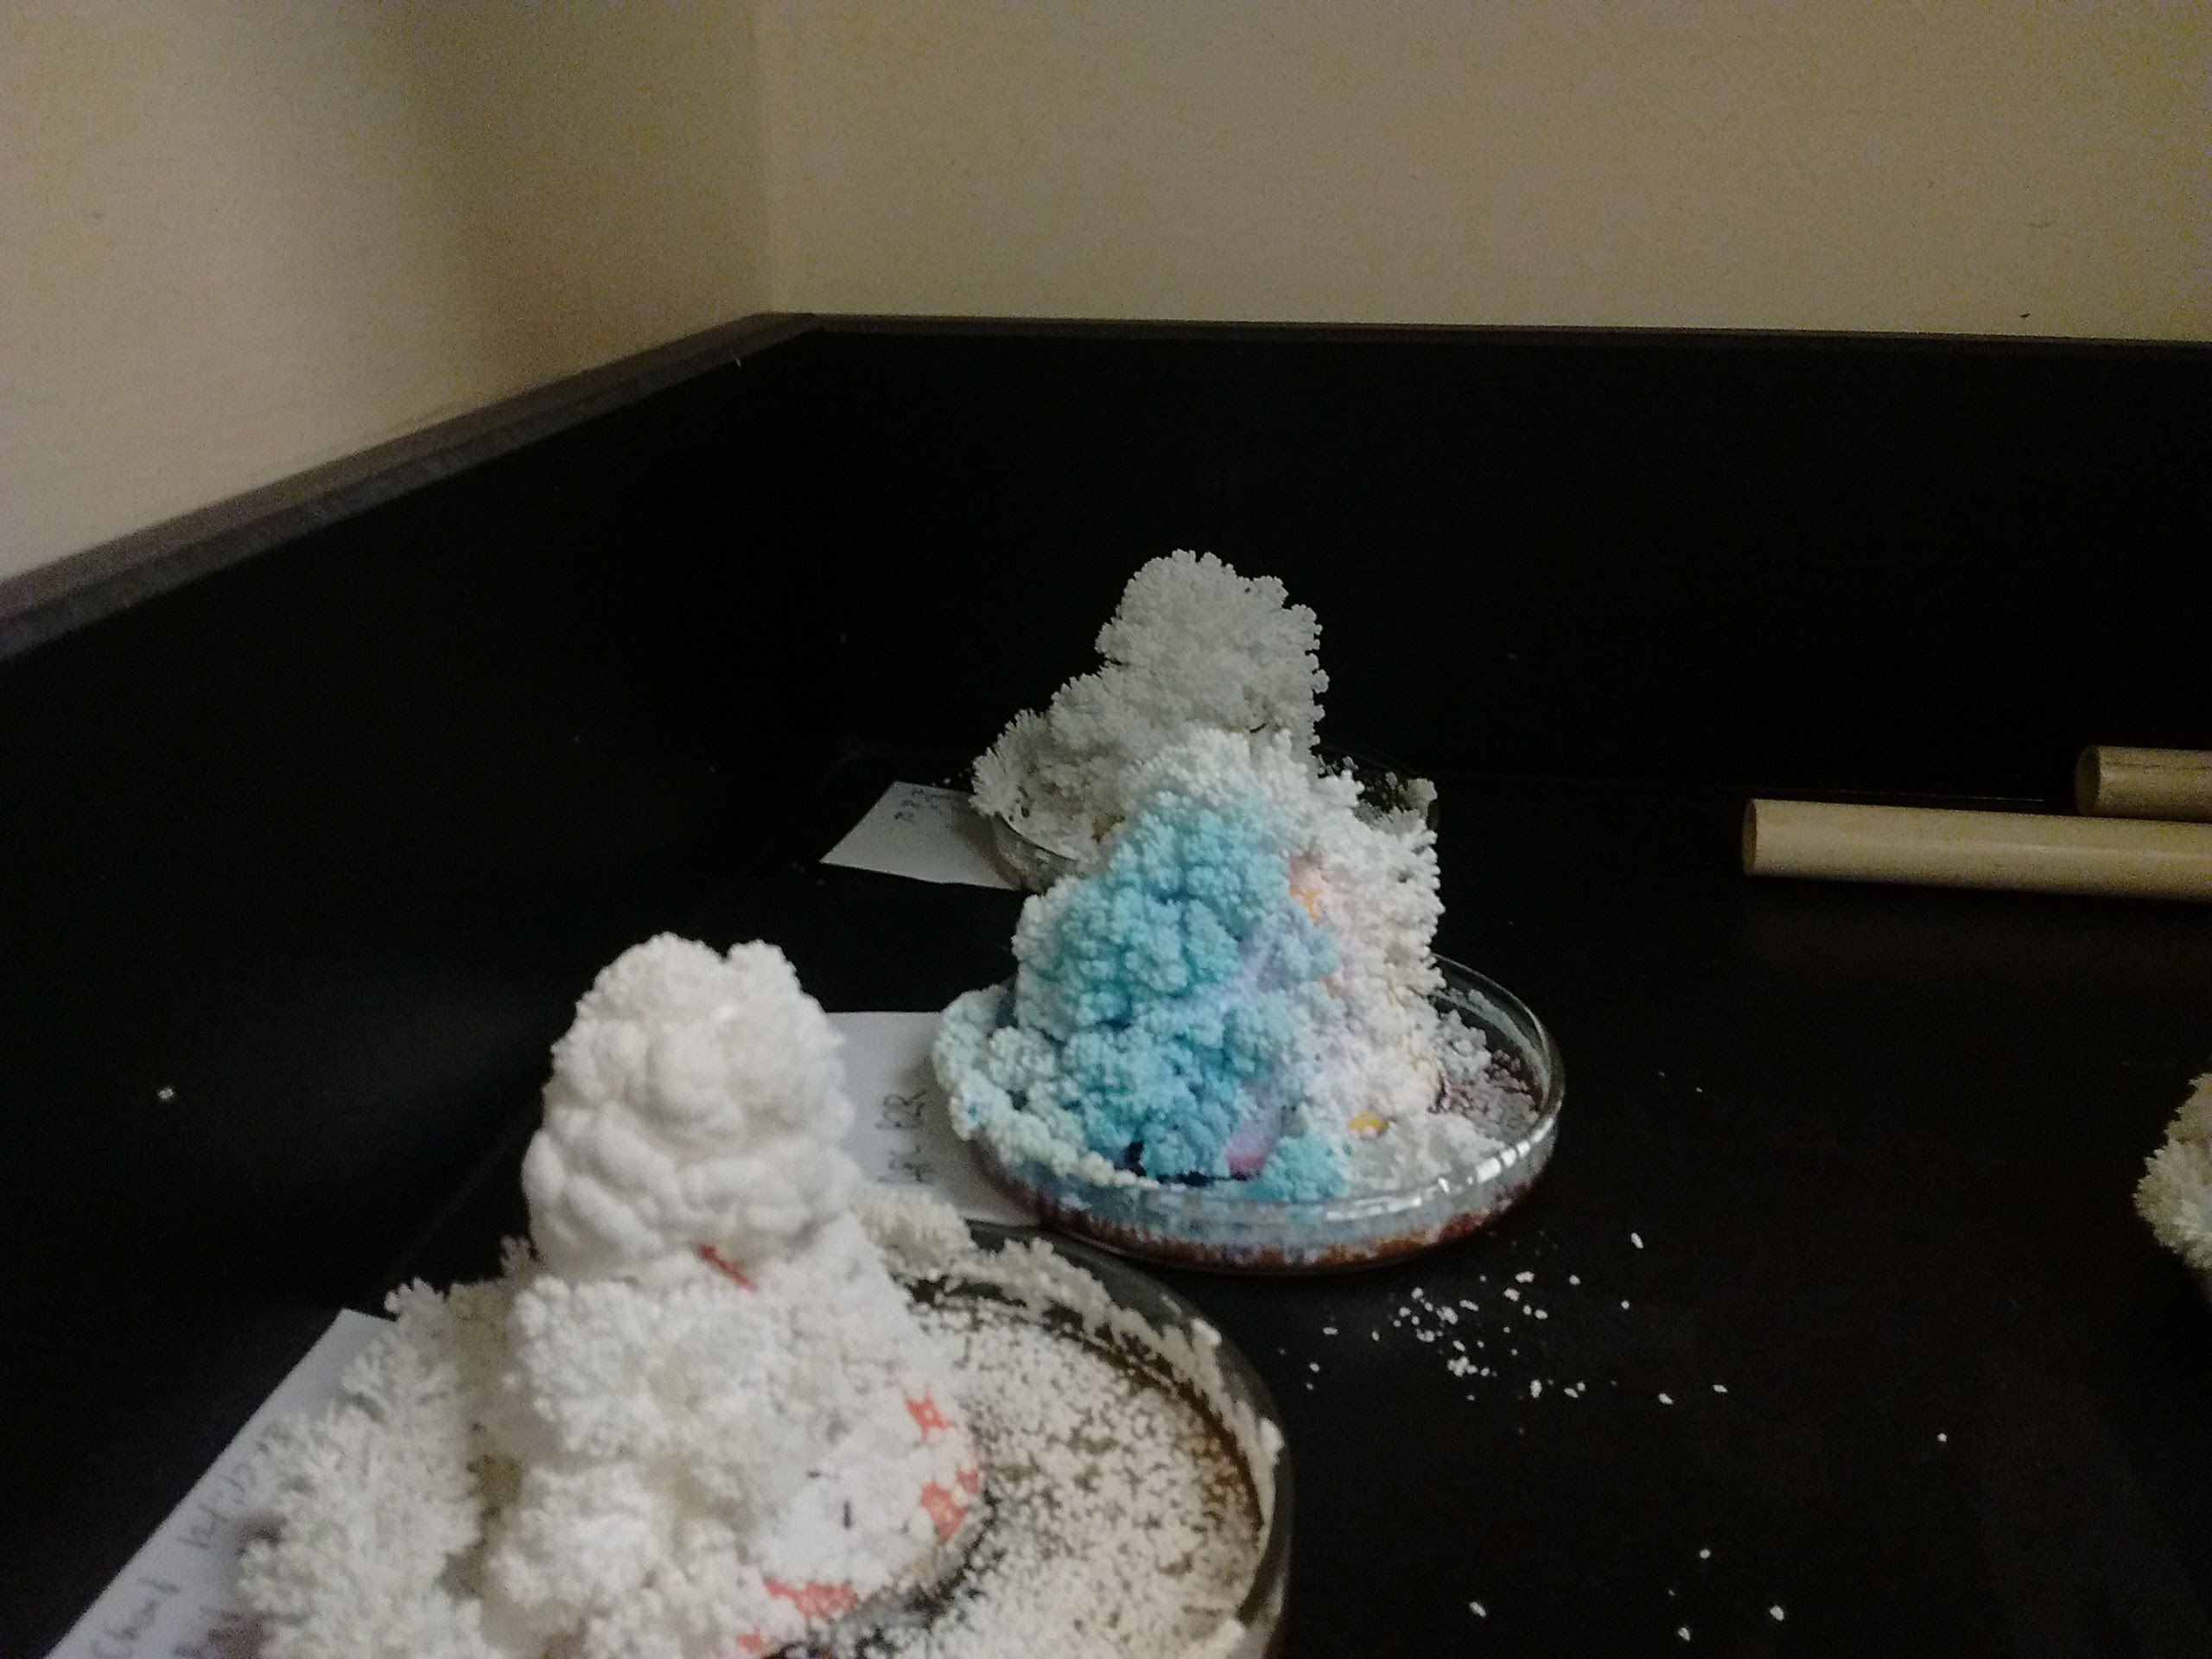
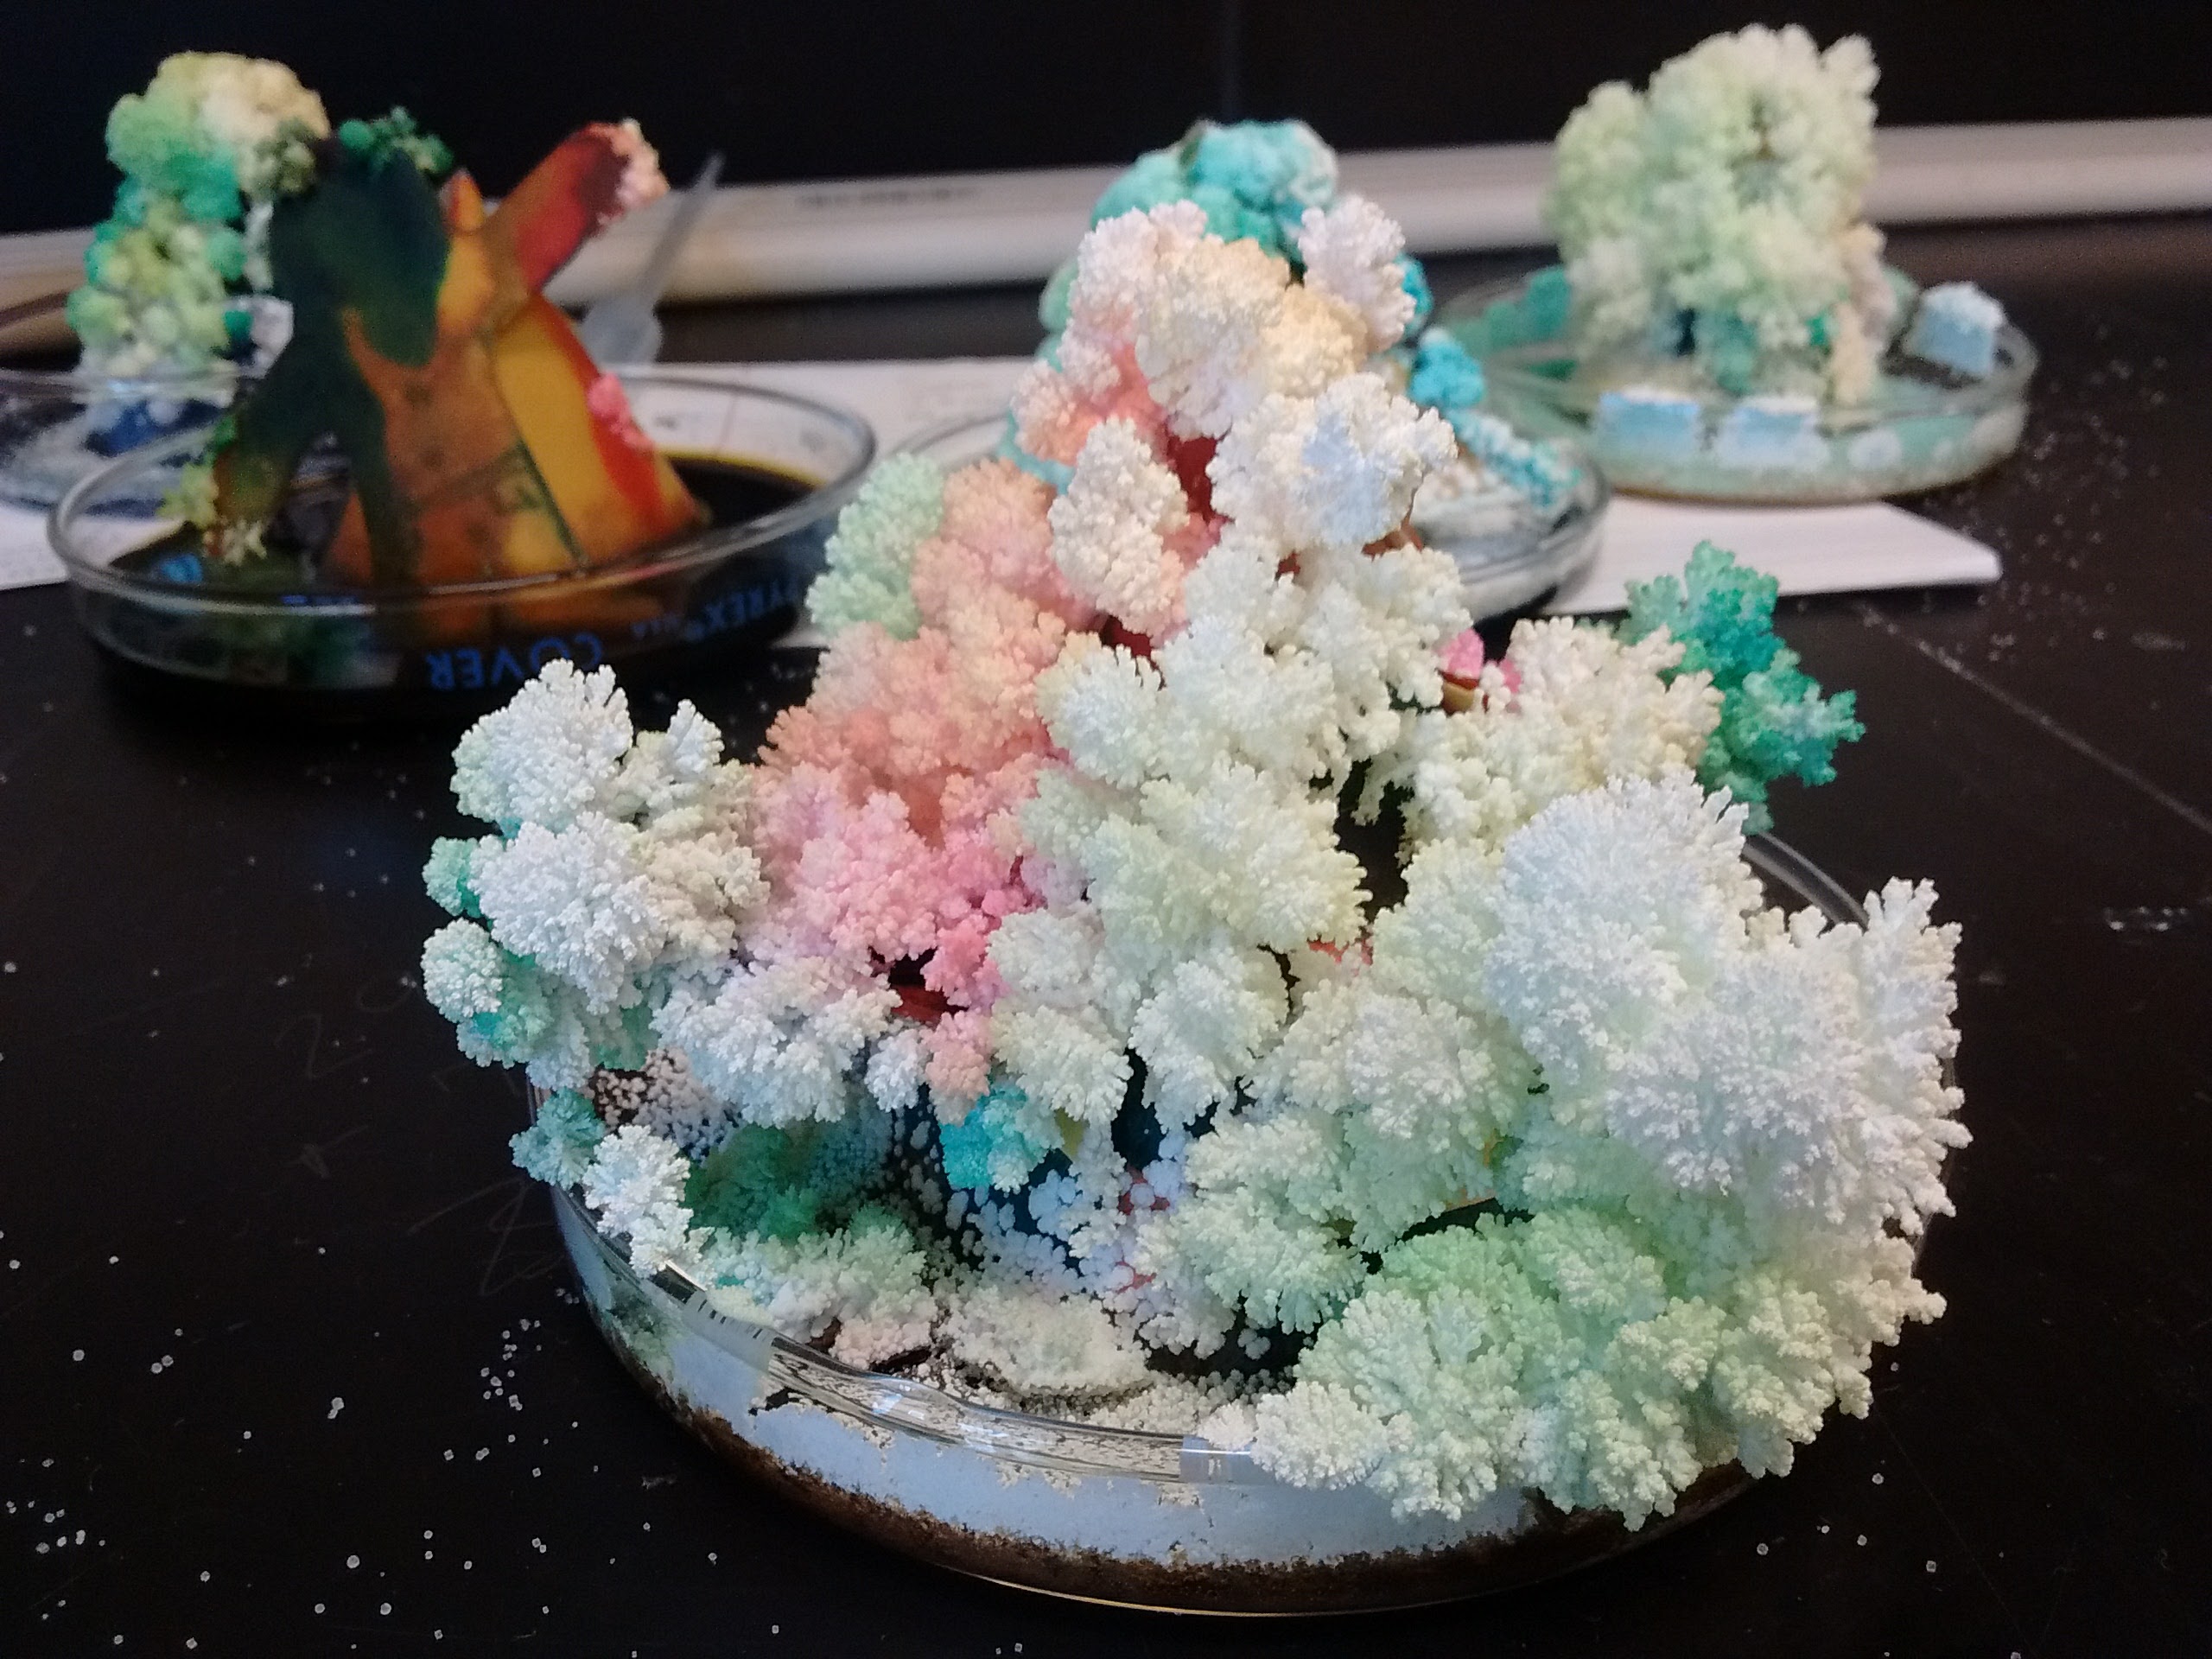
Here are some photos of the resuls of various modifications
of the recipe for a ‘Magic Tree’.
This image shows typical results for the standard recipe as
given in the procedure. One of the trees shows the use of
some blue food coloring.
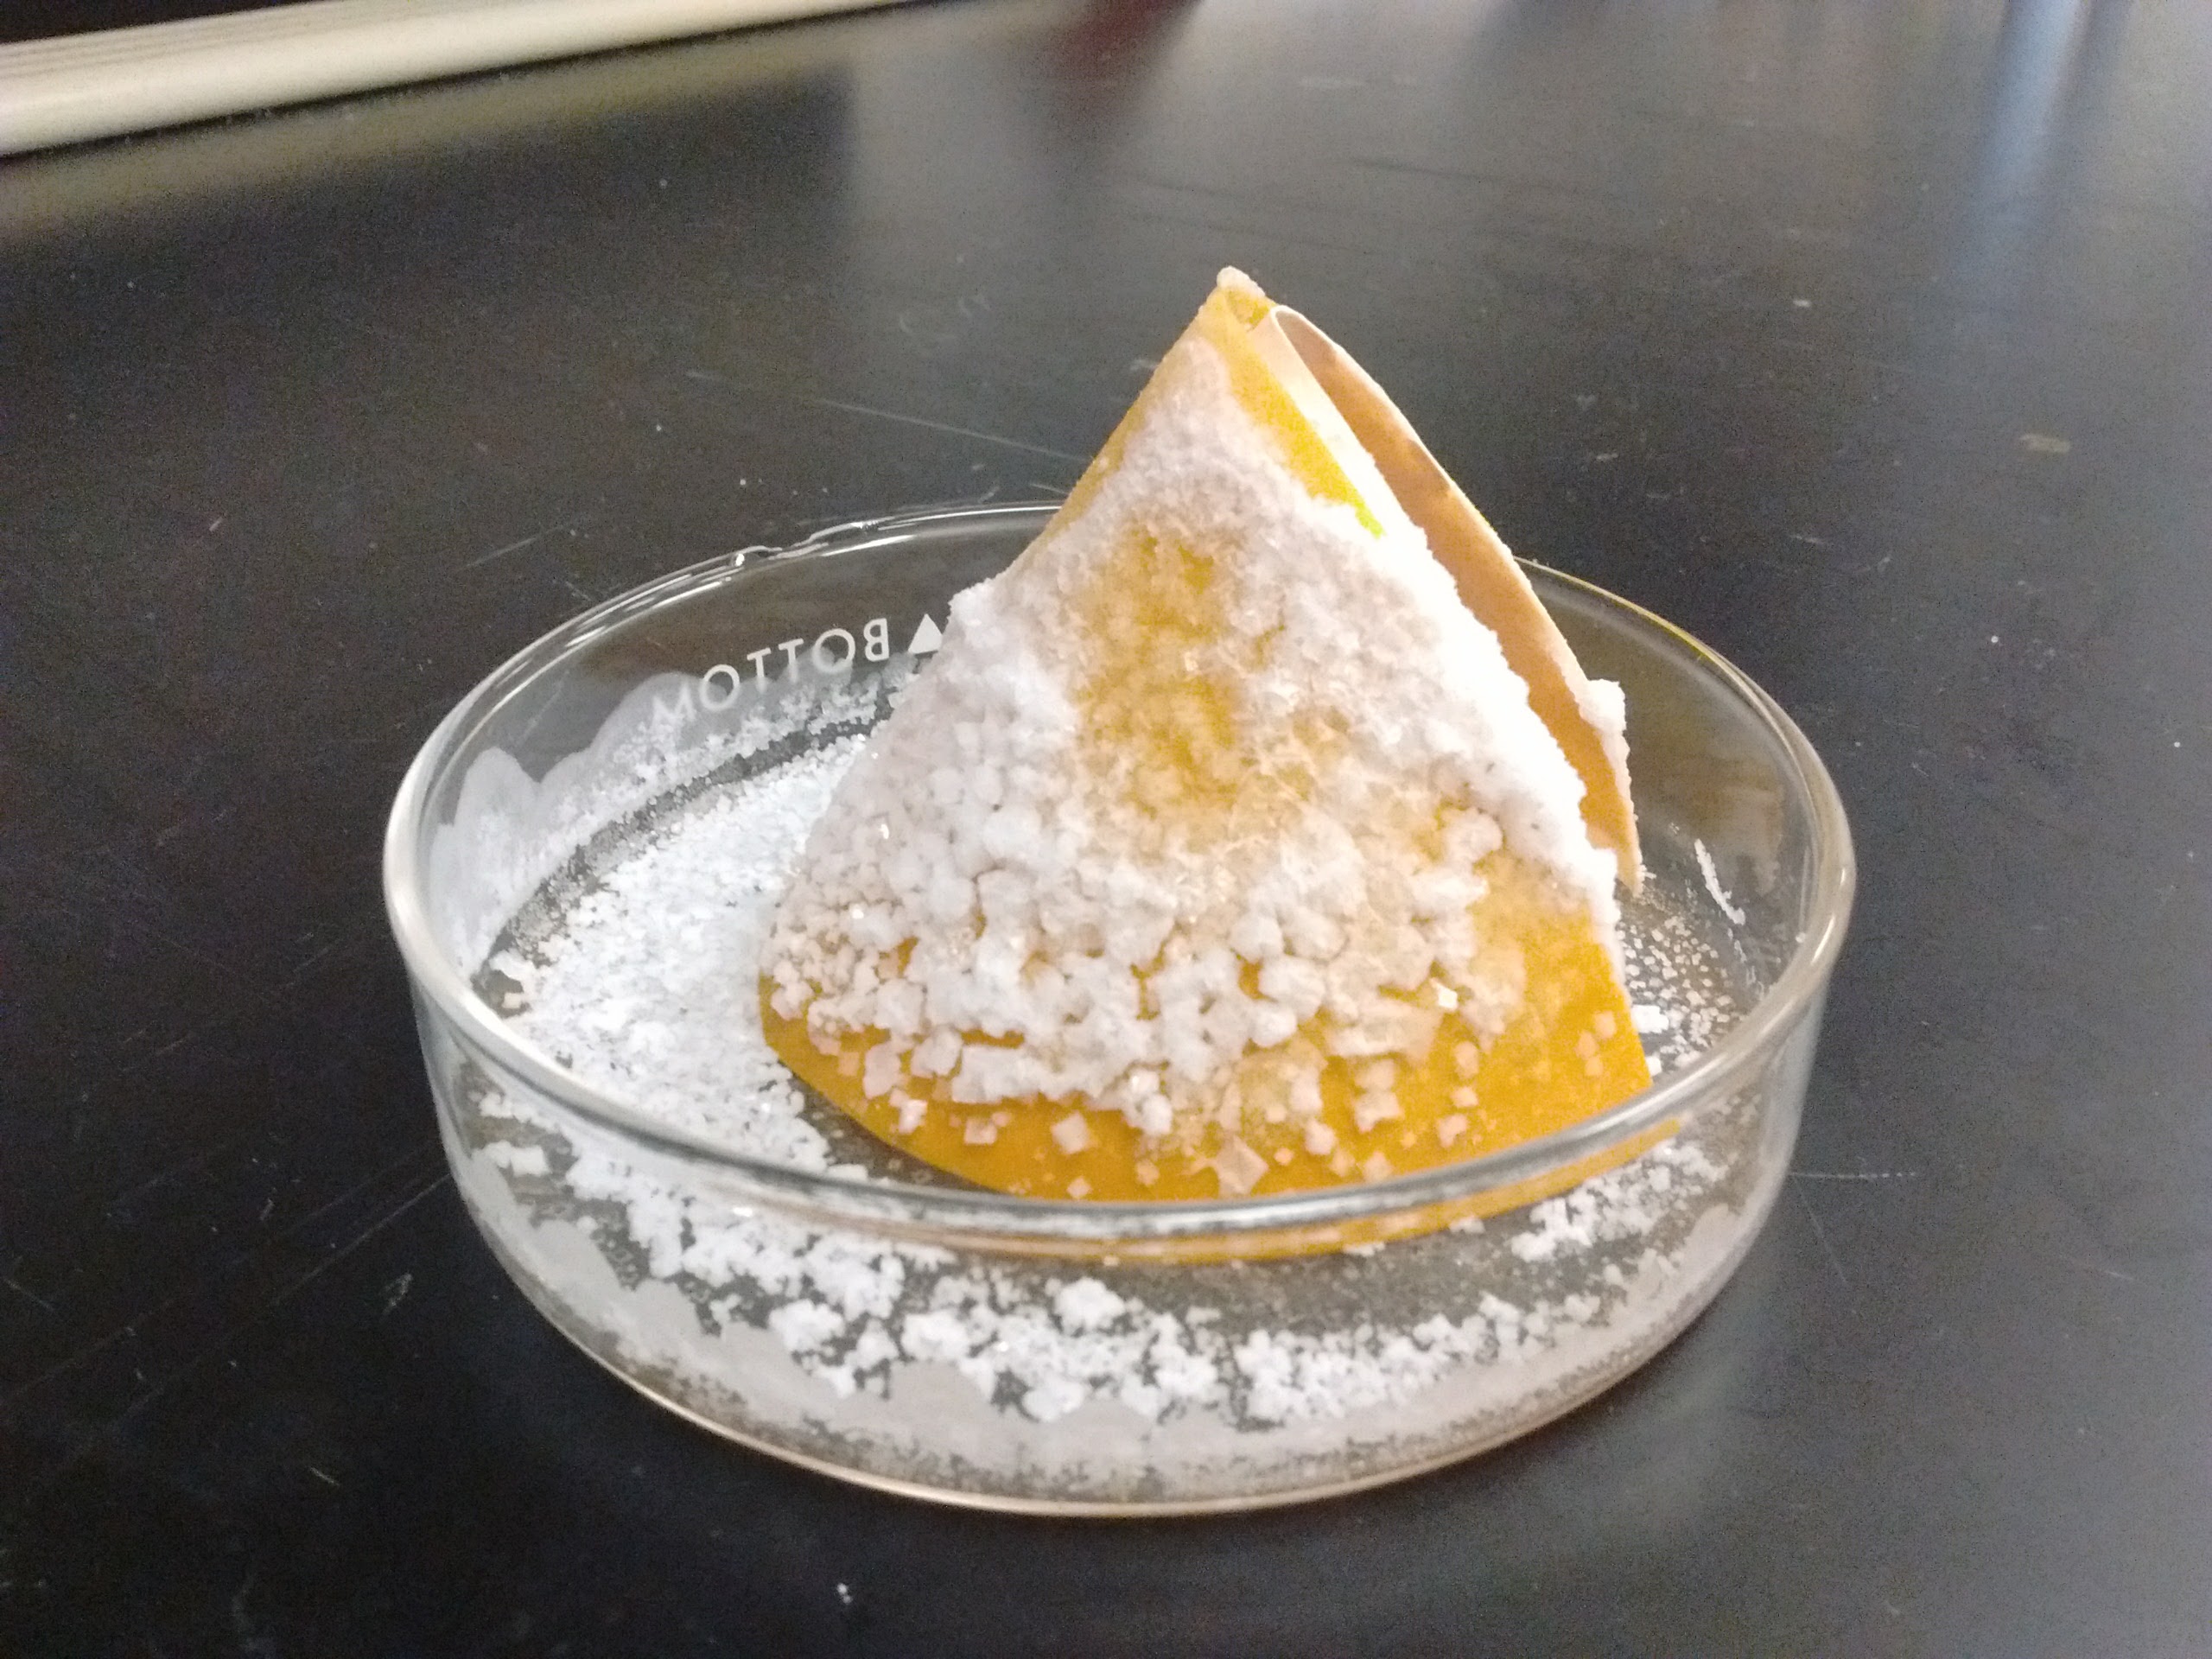
This cone shows crystal growth in the usual cubic shape of
salt crystals. No ammonia or laundry bluing were used in
this dish.
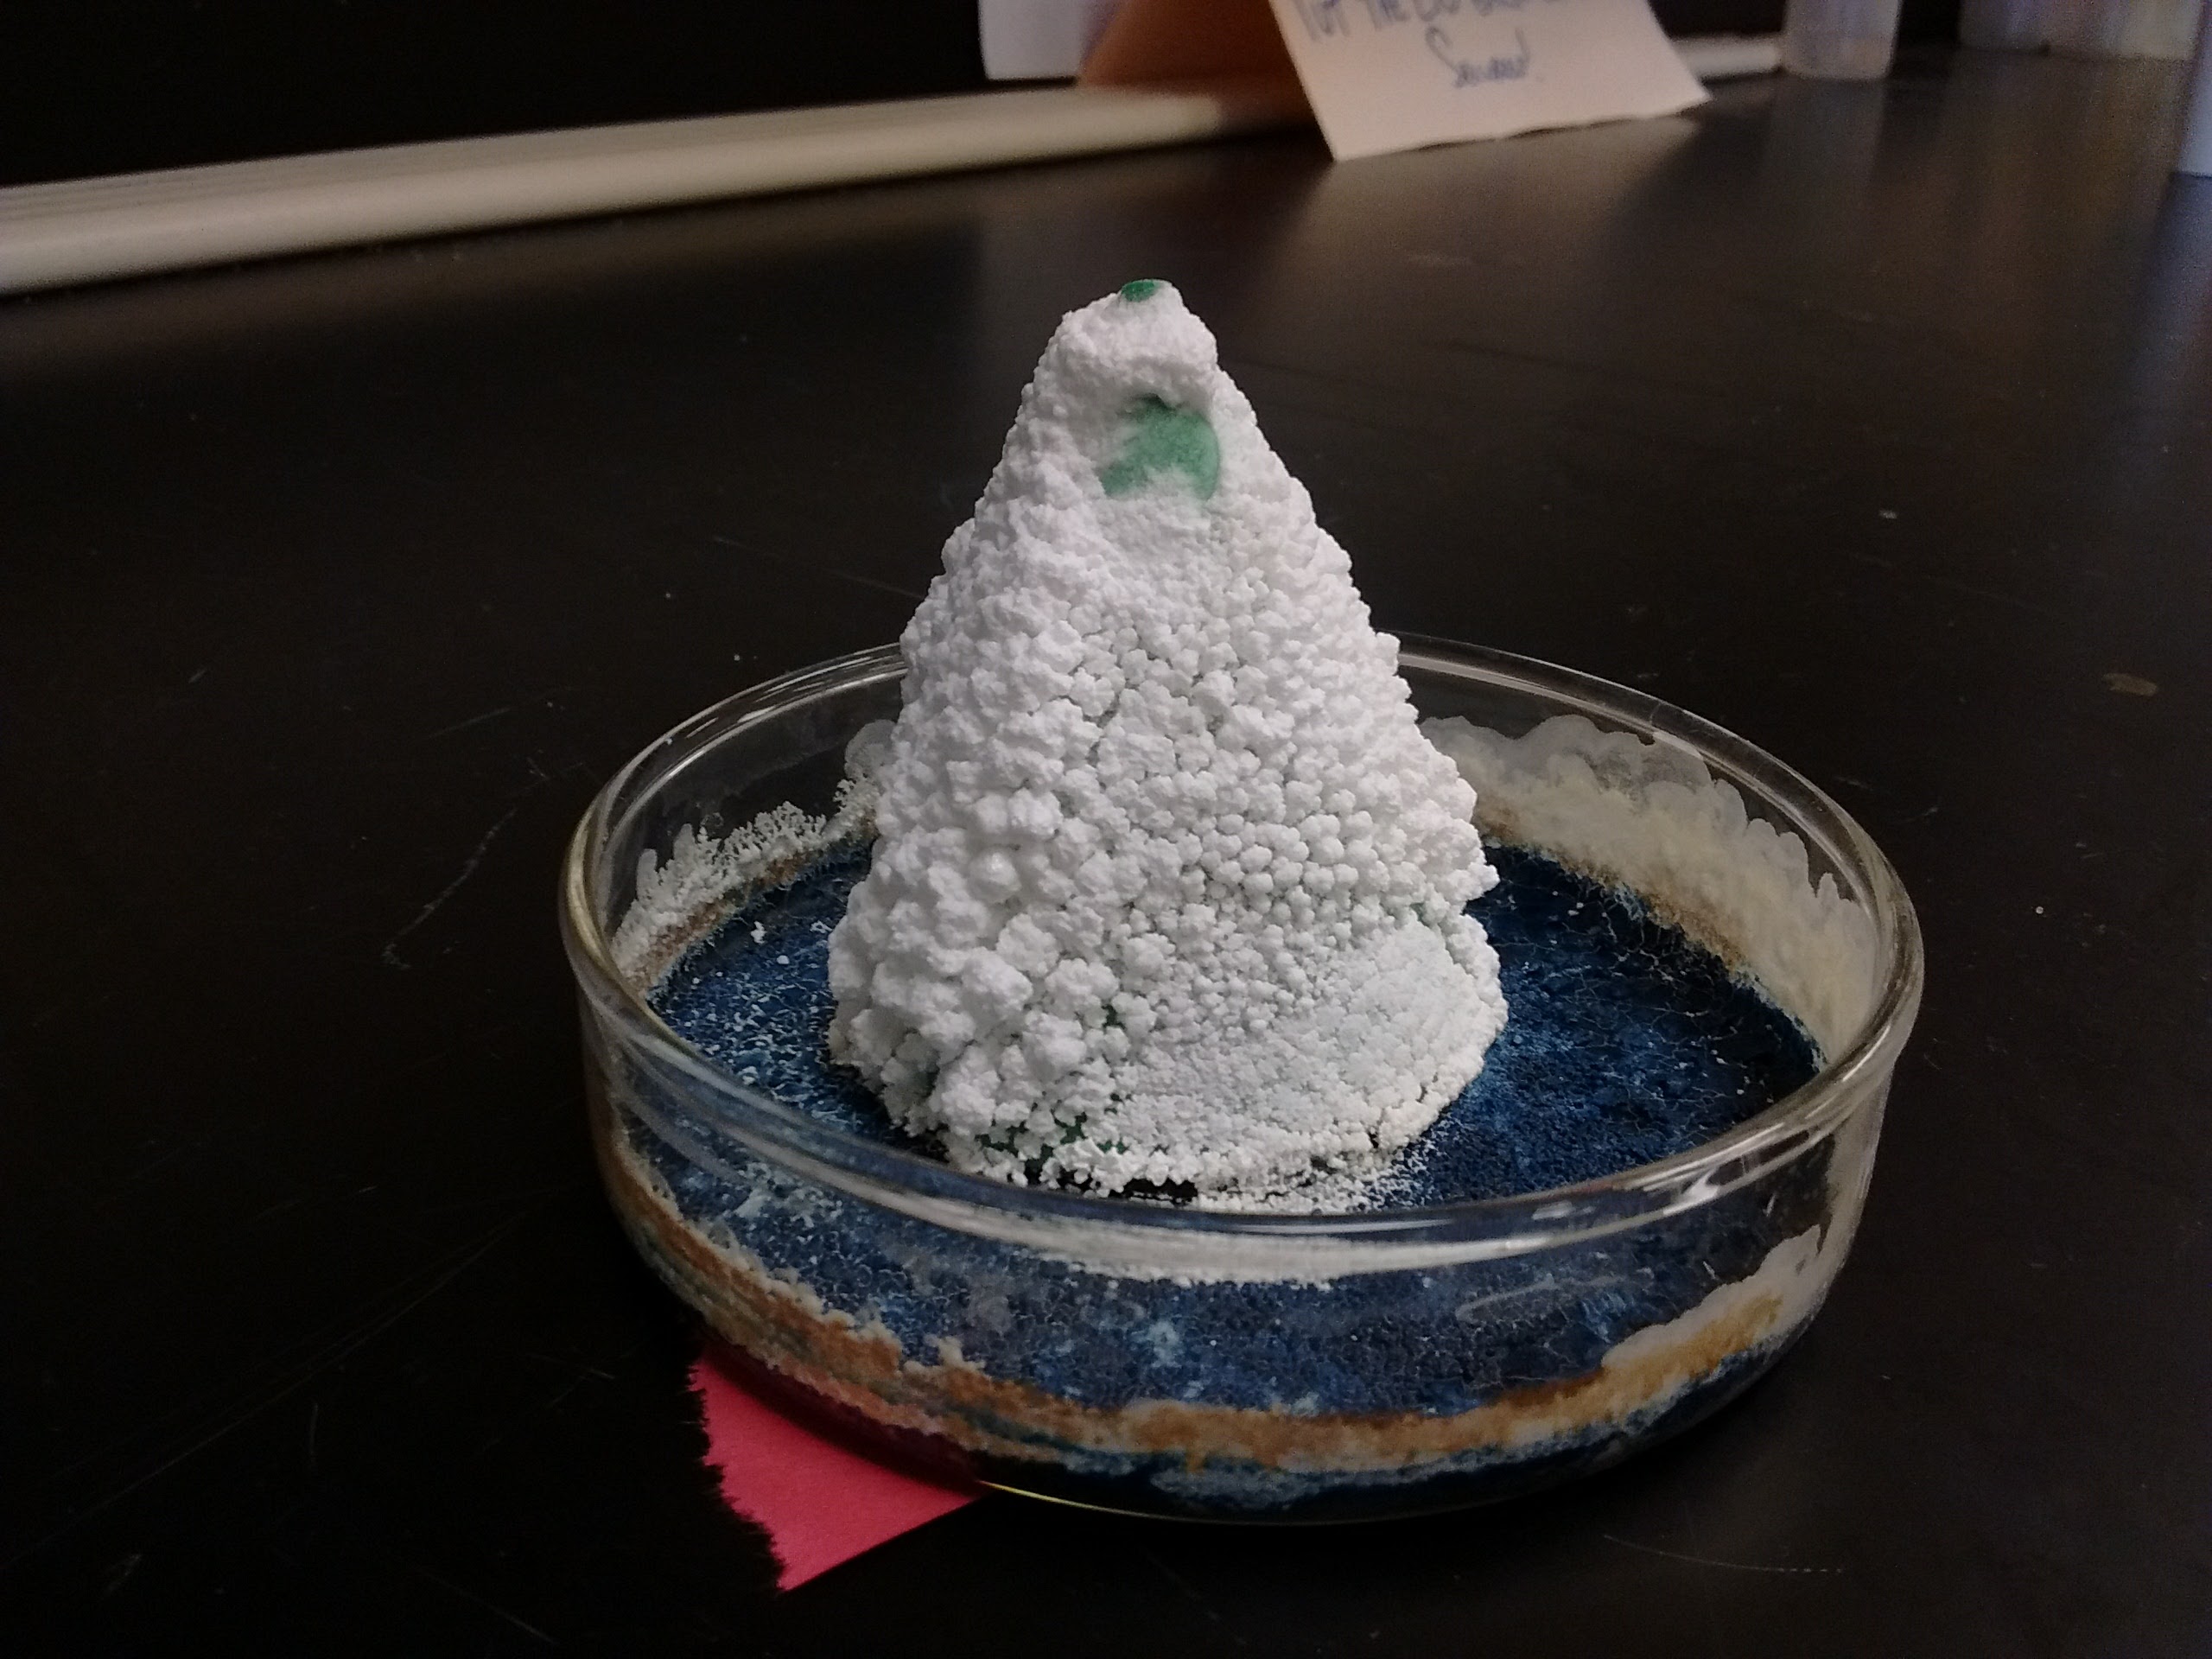
In this dish laundry bluing was used but no ammonia. The
blue color was retained and some of the dendritic crystal
growth can be observed. It is not as extensive as the trees
shown in the first picture above. Without ammonia, less of
the laundry bluing was soluble and so less of it was able
to interfere with the crystallization of the salt. Still,
this shows it is not completely insoluble in water.
This image shows how much more dendritic crystal growth you
can get by attaching pieces of reinforced paper to the
cone. The attached pieces of paper were cut to have a sharp
point. Edges and points encourage evaporation and therefore
crystal growth.